Security News
The Risks of Misguided Research in Supply Chain Security
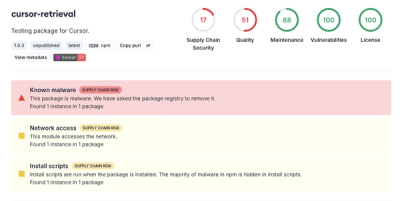
Snyk's use of malicious npm packages for research raises ethical concerns, highlighting risks in public deployment, data exfiltration, and unauthorized testing.
@dialpad/dialtone
Advanced tools
The monorepo for Dialpad's design system Dialtone.
All separate packages of dialtone are also deployed individually. If you would like to use an individual package rather than the combined Dialtone package, you can find documentation for each package in the following table.
The below usage instructions are for the combined package.
npm install @dialpad/dialtone@latest @tiptap/vue-3
npm install @dialpad/dialtone@latest @linusborg/vue-simple-portal @tiptap/vue-2
If you don't care about theming and just want to use Dialtone with the default light theme:
@import "@dialpad/dialtone/css-default-theme";
import "@dialpad/dialtone/css-default-theme";
If you want to use theming, import from the below path. This file does not include design tokens so it is required to also set a theme to apply design tokens to the root element.
@import "@dialpad/dialtone/css";
import "@dialpad/dialtone/css";
Import the theme you want to use and set it via the setTheme function:
import { setTheme } from '@dialpad/dialtone/themes/config';
import DpLight from '@dialpad/dialtone/themes/dp-light';
setTheme(DpLight);
Possible themes are as follows:
There is an optional second parameter to setTheme that allows you to set the theme on a specific element. This is useful in the case of a Shadow DOM
when you want to apply the theme to the root element of the shadow DOM rather than the document root. If you do not set this parameter the theme will be applied to the document root.
import { setTheme } from '@dialpad/dialtone/themes/config';
import DpLight from '@dialpad/dialtone/themes/dp-light';
setTheme(DpLight, document.querySelector('#my-shadow-root-host'));
You may want to use this method if you are unable to use javascript.
You need to import two tokens files in order to apply a theme. A base tokens files, which is either light or dark, and a semantic brand tokens file which is named after a brand and theme 'tokens-dp-light', 'tokens-dp-dark', 'tokens-tmo-light', ...
@import "@dialpad/dialtone/tokens/tokens-base-light.css" // Base light theme
@import "@dialpad/dialtone/tokens/tokens-dp-light.css" // Dialpad light brand
import "@dialpad/dialtone/tokens/tokens-base-light.css" // Base light theme
import "@dialpad/dialtone/tokens/tokens-dp-light.css" // Dialpad light brand
// Named import
import { DtIconArrowUp } from '@dialpad/dialtone-icons/vue2';
import { DtIllustrationBlankSpace } from '@dialpad/dialtone-icons/vue2';

// Default import (Prefered if using webpack as it is tree-shakeable by default)
import DtIconArrowUp from '@dialpad/dialtone-icons/vue2/arrow-up';
import DtIllustrationBlankSpace from '@dialpad/dialtone-icons/vue2/blank-space';
// Named import
import { DtIconArrowUp } from '@dialpad/dialtone-icons/vue3';
import { DtIllustrationBlankSpace } from '@dialpad/dialtone-icons/vue3';

// Default import (Prefered if using webpack as it is tree-shakeable by default)
import DtIconArrowUp from '@dialpad/dialtone-icons/vue3/arrow-up';
import DtIllustrationBlankSpace from '@dialpad/dialtone-icons/vue3/blank-space';
// Named import
import { DtButton } from "@dialpad/dialtone/vue2"

// Default import (Prefered if using webpack as it is tree-shakeable by default)
import { DtButton } from "@dialpad/dialtone/vue2/lib/button"
// Named import
import { DtButton } from "@dialpad/dialtone/vue3"

// Default import (Prefered if using webpack as it is tree-shakeable by default)
import { DtButton } from "@dialpad/dialtone/vue3/lib/button"
The @dialpad/dialtone repository is a monorepo composed of Dialtone NPM packages and apps.
The following is a list of packages included in this monorepo. Note that libraries (packages folder) are separated from apps (apps folder):
dialtone/
|--- .github                      # Github configuration and workflows
|--- apps                         # Apps
  |--- dialtone-documentation     # Documentation site
|--- packages                     # NPM packages
  |--- dialtone-css               # CSS library
  |--- dialtone-emojis            # Emoji assets
  |--- dialtone-vue2              # Vue component library compatible with vue@2
  |--- dialtone-vue3              # Vue component library compatible with vue@3
  |--- dialtone-icons             # SVG icons library
  |--- dialtone-tokens            # Tokens library
  |--- eslint-plugin-dialtone     # Custom ESLint rules for Dialtone users
  |--- stylelint-plugin-dialtone  # Custom Stylelint rules for Dialtone users
|--- scripts                      # Shared scripts
| Name | Description | Version |
|---|---|---|
| Dialtone | Combined package containing the latest versions of the libraries for ease of use |  |
| Dialtone CSS | Classes or styles used within Dialtone should be stored here and documented on our site under apps/dialtone-documentation |  |
| Dialtone emojis | Emoji assets |  |
| Dialtone icons | Resources needed to implement icons on your application that conform to Dialpad’s design principles and best practices | |
| Dialtone tokens | Design tokens for Dialpad's design system Dialtone and everything related to building and publishing them |  |
| Dialtone vue 2 | Vue components library to simplify and standardize the use of common UI patterns and behaviour across all Dialpad projects (compatible with Vue 2) |  |
| Dialtone vue 3 | Vue components library to simplify and standardize the use of common UI patterns and behaviour across all Dialpad projects (compatible with Vue 3) |  |
| ESlint plugin | ESLint plugin containing rules to help developers maintain dialtone recommended practices |  |
| Stylelint plugin | StyleLint plugin containing rules to help developers maintain dialtone recommended practices for CSS |  |
Please read our contributing guide before submitting a pull request.
If you would like to contribute to Dialtone without having to do any local environment setup, you can use GitHub Codespaces. You can initialize a new Codespace by clicking the green "Code" button at the top right of the Dialtone GitHub page.

Please see the Codespaces docs for more information.
PNPM (Performant NPM) is a package management solution designed to address the challenges posed by traditional package managers.
We use PNPM to manage everything related to NPM, adding, installing, removing and publishing packages.
You will need to install PNPM locally to contribute to this project. https://pnpm.io/installation
npm install -g pnpm
Use PNPM to manage package dependencies
pnpm add eslint --filter dialtone-icons
Run package scripts with PNPM, this will not use NX cache and pipelines, so you might end up missing dependencies that needed to be built before.
pnpm run --filter dialtone-css build
Nx is a build system with built-in tooling and advanced CI capabilities. It helps you maintain and scale monorepos, both locally and on CI.
NX manages the scheduling and caching of our PNPM scripts.
We still rely on the package installation and package linking mechanism that PNPM workspaces provide us, but use Nx instead to run our tasks in the most efficient way.
One of the main benefits of adding Nx to our PNPM workspace is speed via caching.
Running commands via NX will enable us to do several things:
⚠️ You can run the commands with PNPM too, but it's not advisable as You'll lose the advantages that NX provides.
For more information, check setup a monorepo with PNPM workspaces and NX
It is recommended to install NX globally via:
pnpm add --global nx@latest
Use NX to run scripts, this will use cache, improve the performance, and build any dependency needed before running your command.
nx run dialtone-css:build
Try installing packages with NX, this doesn't work at all, please use PNPM instead.
nx add eslint --filter dialtone-icons
First, install the dependencies for all the monorepo packages and apps.
pnpm install
nx run dialtone-documentation:start
This will start the documentation site and watch the library for changes, it will be live updated with any changes.
Access the local server at http://localhost:4000
nx run dialtone-vue2:start
Access the local storybook server for Dialtone Vue 2 via http://localhost:9010/
nx run dialtone-vue3:start
Access the local storybook server for Dialtone Vue 3 via http://localhost:9011/
nx run dialtone:build
nx run dialtone:test:vue
nx run dialtone-vue2:test
nx run dialtone-vue3:test
Use the --filter flag to run commands for a specific package or app.
pnpm add <dependency> --filter <package or app name>
Example:
pnpm add eslint --filter dialtone-icons
To install a local dependency, just add the --workspace flag
pnpm add <dependency> --filter <package or app name> --workspace
Example:
pnpm add @dialpad/dialtone-tokens --filter dialtone-icons --workspace
You can run commands like build, test, start for individual packages from
the root of the project using:
nx run <package/app>:<target>
Example:
nx run dialtone-documentation:build
A way to see local Dialtone changes in a local running frontend is to use a local package.
To create a Dialtone package, first run (in Dialtone repo):
pnpm pack
This will generate a .tgz file, with the same format as the one published on npm. To use this package on another project you can run:
npm install <path to previously generated tgz file>
npm run dev
Currently, Dialtone packages are being released in two different ways: scheduled and manually.
The scheduled release will only release changes to production while manually you can choose to release
alpha, beta or next branches.
On every Tuesday at 10:00 am UTC, release action will trigger the production release process which automatically release all packages that need to be released following the next steps:
release target on every project.staging to production branch.production branch.In case you need to release earlier than the next scheduled date, you can trigger the release via Run workflow on GitHub.
staging branch.package that you want to release or leave it empty to release all of them.This will trigger the release action, release changes on staging and automatically publish the selected packages following the next steps:
release target on selected packages (all if package is empty).staging to production branch.production branch.Run workflow.alpha, beta or next branch.package that you want to release or leave it empty to release all of them.This will trigger the release action, release changes on the selected branch and automatically publish the selected packages following the next steps:
release target on selected packages (all if package is empty).FAQs
Dialpad's Dialtone design system monorepo
The npm package @dialpad/dialtone receives a total of 813 weekly downloads. As such, @dialpad/dialtone popularity was classified as not popular.
We found that @dialpad/dialtone demonstrated a healthy version release cadence and project activity because the last version was released less than a year ago. It has 0 open source maintainers collaborating on the project.
Did you know?

Socket for GitHub automatically highlights issues in each pull request and monitors the health of all your open source dependencies. Discover the contents of your packages and block harmful activity before you install or update your dependencies.

Security News
Snyk's use of malicious npm packages for research raises ethical concerns, highlighting risks in public deployment, data exfiltration, and unauthorized testing.

Research
Security News
Socket researchers found several malicious npm packages typosquatting Chalk and Chokidar, targeting Node.js developers with kill switches and data theft.

Security News
pnpm 10 blocks lifecycle scripts by default to improve security, addressing supply chain attack risks but sparking debate over compatibility and workflow changes.