New Case Study:See how Anthropic automated 95% of dependency reviews with Socket.Learn More
Socket
Sign inDemoInstall
Socket

@easyv/cli

Package Overview
Dependencies
Maintainers
2
Versions
130
Alerts
File Explorer

Advanced tools

Socket logo

Install Socket

Detect and block malicious and high-risk dependencies

Install

@easyv/cli

Easy[V] component tools

  • 1.0.17
  • npm
  • Socket score

Version published
Weekly downloads
0
decreased by-100%
Maintainers
2
Weekly downloads
 
Created
Source

快速开始

本文将介绍如何使用easyv官方组件工具包进行开发,它提供一种无需配置的现代化构建方式来快速的进入开发步骤。

安装工具包

推荐使用 Node >= 12.13.0 的版本,如果您没有安装NodeJS,可以进入NodeJS官网下载并安装NodeJS。安装成功后,在命令行操作界面执行node -vnpm -v命令(Mac在terminal中执行,Windows在powershell中执行),查看Node和npm版本。

如果您不想更换当前使用的NodeJS版本,推荐安装nvm来进行Node版本管理。安装使用请查看https://github.com/nvm-sh/nvm

npm i -g @easyv/cli --registry=https://registry.npm.taobao.org

安装完成后,执行easyv --version查看工具包版本。

如果你已经安装过 @easyv/cli 而不是最新版本,我们建议您先执行npm uninstall -g @easyv/cli删除旧版本后,再重新安装以获取最新版本。


## 创建新项目 ```bash easyv create my-project ``` 执行该命令后,会在命令行所在的目录创造一个文件夹,在安装的最后,您可以选择一种感兴趣的模版,并定义您的组件名称。
![image.png](https://cdn.nlark.com/yuque/0/2020/png/664363/1595576512547-614171bc-808b-4b31-a858-4ba7068a1a13.png#align=left&display=inline&height=102&margin=%5Bobject%20Object%5D&name=image.png&originHeight=204&originWidth=562&size=74406&status=done&style=none&width=281)
输入模版名称后,项目就创建完成了。
![image.png](https://cdn.nlark.com/yuque/0/2020/png/664363/1595576607059-d62d0d7e-20c1-4e6e-98e2-e2dd810d953a.png#align=left&display=inline&height=105&margin=%5Bobject%20Object%5D&name=image.png&originHeight=210&originWidth=1050&size=83271&status=done&style=none&width=525)

启动开发环境

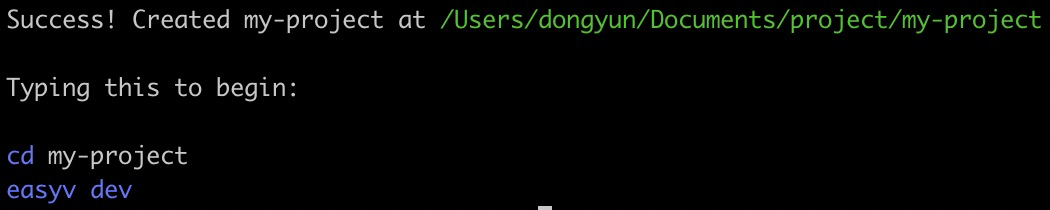
接着上一步的最后,在工具包输出信息的最后会显示项目位置以及启动命令,您可以输入该命令来启动项目,与下列相同

cd my-project
easyv dev

如果您安装了chrome浏览器,将自动打开浏览器,我们推荐您使用chrome版本 >= 65 以获得更加稳定和性能优化的支持。

启动成功后,页面会出现一个组件列表,选择一个点击进入开发界面,如下所示:
image.png
如果浏览器没有被打开,也可以手动打开终端显示的地址。
image.png

文件目录规范

在开发EasyV组件时,需要遵循一些文件目录规范。
一个典型的组件目录结构参考如下

.
├── package.json                                    // easyv打包配置
├── src
│   └── components                                  // 所有组件列表
│       ├── text                                    // 第一个组件
│       │   ├── config                              // 组件配置文件存放目录
│       │   │   ├── main.data.json                  // 数据配置
│       │   │   └── main.json                       // 组件信息/属性/交互配置等
│       │   ├── index.jsx                           // 组件入口
│       │   └── utils
│       │       ├── Component.js
│       │       ├── OrbitControls.js
│       │       └── reduce-config.js
│       └── text1                                   // 第二个组件
│           ├── config
│           │   ├── main.data.json
│           │   └── main.json
│           ├── index.jsx
│           └── utils
│               └── reduce-config.js
└── yarn.lock

在开发组件包之前,您需要先生成组件包,推荐执行easyv generate生成文件结构。如果您自己创建文件夹,请存放在components目录下,推荐使用组件名称作为文件夹名称。

配置说明

main.json

一个基本的组件配置文件如下,该文件定义组件的基本信息、样式配置、交互配置、回调配置。在[组件配置指南](https://dtstack.yuque.com/docs/share/1dfea0bf-3cec-4f33-9fa9-3f397c5c3406?# 《配置说明》)查看更详细的说明

{
  "base": {                                                   // 组件描述信息
    "name": "文本1",                                           // 组件中文名称
    "modulename": "text1",                                    // 组件英文名称
    "category": "文字",                                        // 组件所属类目
    "version": "1.0.0",                                       // 组件版本号
    "show": 1
  },
  "configuration": [
    {
      "_name": "chart",
      "_displayName": "组件",
      "_value": [
        {
          "_name": "dimension",
          "_displayName": "位置尺寸",
          "_value": [
            {
              "_name": "chartPosition",
              "_displayName": "图表位置",
              "_value": [
                {
                  "_name": "left",
                  "_displayName": "X轴坐标",
                  "_value": 100
                },
                {
                  "_name": "top",
                  "_displayName": "Y轴坐标",
                  "_value": 100
                }
              ]
            },
            {
              "_name": "chartDimension",
              "_displayName": "图表尺寸",
              "_value": [
                {
                  "_name": "width",
                  "_displayName": "宽度",
                  "_value": 400
                },
                {
                  "_name": "height",
                  "_displayName": "高度",
                  "_value": 200
                }
              ]
            }
          ]
        },
        {
          "_name": "component",
          "_displayName": "全局样式",
          "_value": [
            {
              "_name": "fontFamily",
              "_displayName": "字体",
              "_value": "Microsoft Yahei",
              "_type": "font"
            },
            {
              "_name": "fontSize",
              "_displayName": "大小",
              "_value": 32
            },
            {
              "_name": "color",
              "_displayName": "颜色",
              "_value": "#ddd",
              "_type": "color"
            }
          ]
        }
      ]
    }
  ]
}

main.data.json

一个基本的数据配置文件如下,该文件定义组件默认的静态数据内容,以及字段的映射配置。在[组件配置指南](https://dtstack.yuque.com/docs/share/1dfea0bf-3cec-4f33-9fa9-3f397c5c3406?# 《配置说明》)查看更详细的说明

{
    "data": [
        {
            "text": "我是文字组件"
        }
    ],
    "fields": [
        {
            "name": "text",
            "value": "text",
            "desc": "文本"
        }
    ]
}

FAQs

Package last updated on 11 Aug 2020

Did you know?

Socket

Socket for GitHub automatically highlights issues in each pull request and monitors the health of all your open source dependencies. Discover the contents of your packages and block harmful activity before you install or update your dependencies.

Install

Related posts

SocketSocket SOC 2 Logo

Product

  • Package Alerts
  • Integrations
  • Docs
  • Pricing
  • FAQ
  • Roadmap
  • Changelog

Packages

npm

Stay in touch

Get open source security insights delivered straight into your inbox.


  • Terms
  • Privacy
  • Security

Made with ⚡️ by Socket Inc