Security News
Bun 1.2 Released with 90% Node.js Compatibility and Built-in S3 Object Support
Bun 1.2 enhances its JavaScript runtime with 90% Node.js compatibility, built-in S3 and Postgres support, HTML Imports, and faster, cloud-first performance.
@eeacms/volto-arcgis-block
Advanced tools
This Volto block allows adding a map block into your site but it has several dependencies.
This block has been implemented to fit the needs of the Copernicus Land Monitoring Service, and as such, it requires an specific endpoint on the Plone site to retrieve the information to be shown in the map.
This endpoint is called @mapviewer and an example implementation is in the clms.types product.
This means that the product is not generic enough to show any ArcGIS map.
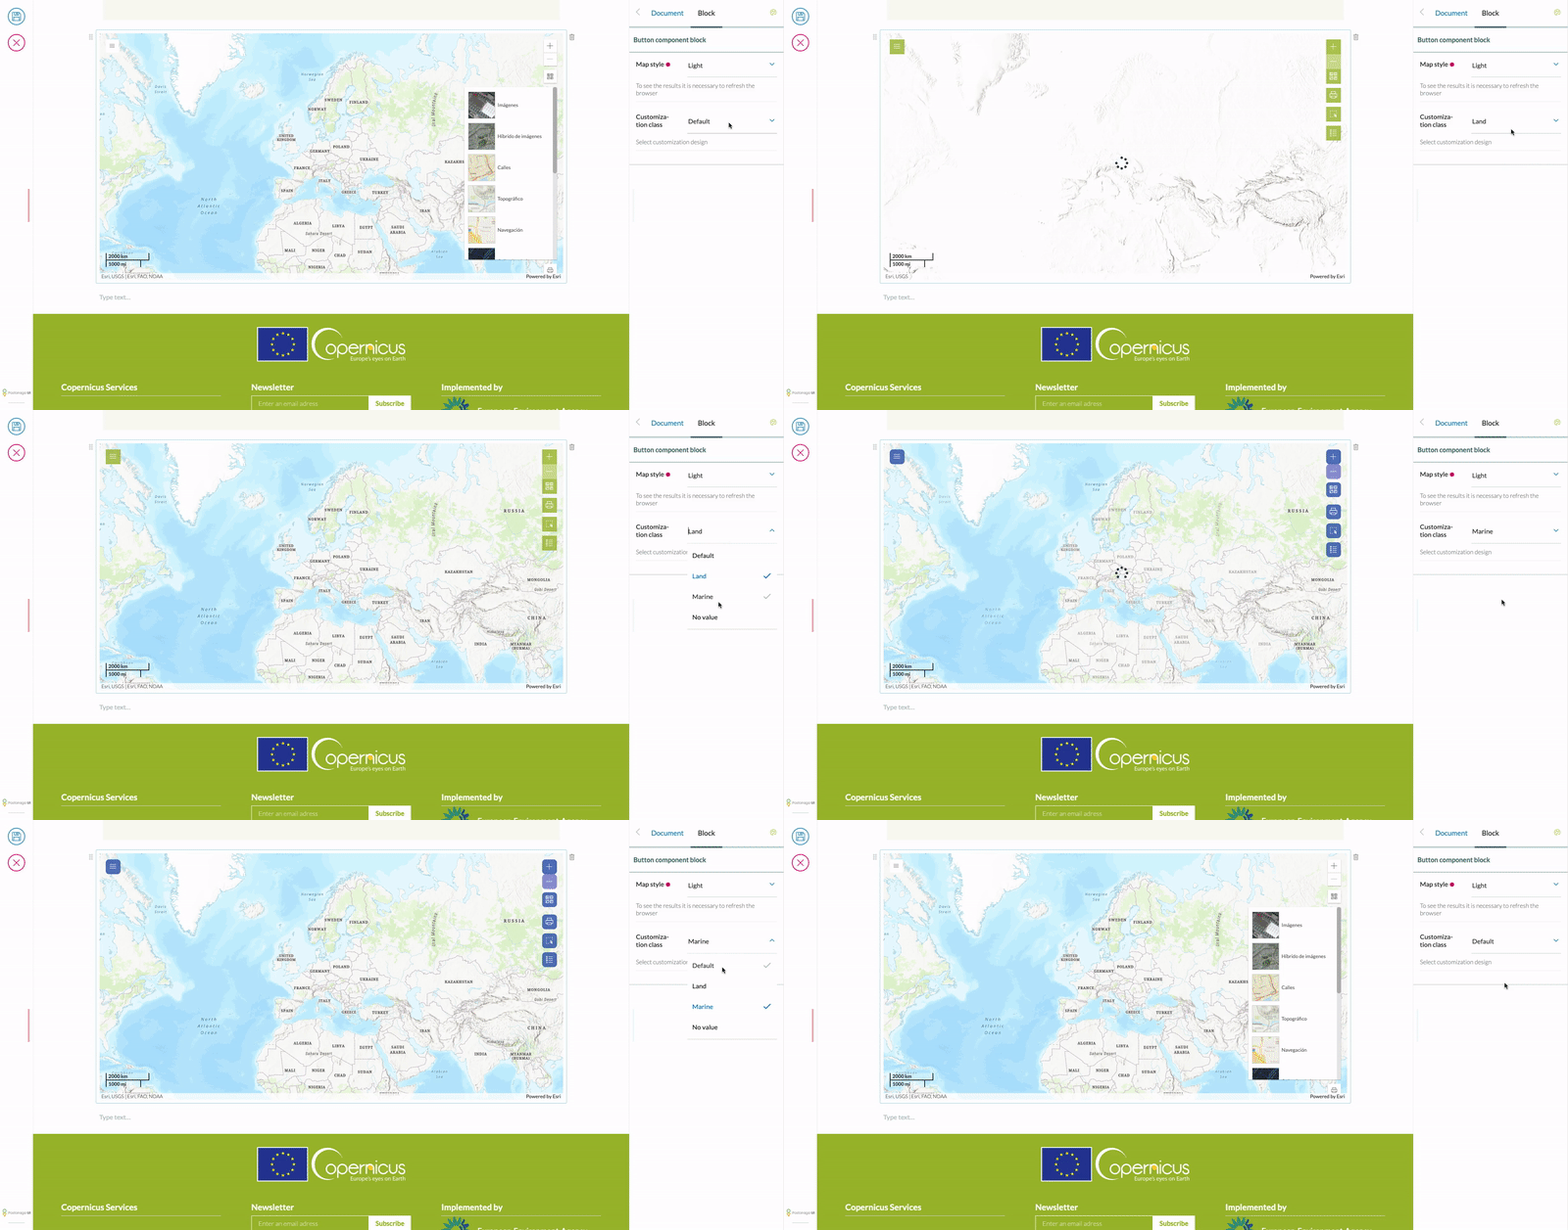
To create custom styles, we need to add it in the block configuration and import the Less file into our project.
import { ARCGIS_BLOCK } from '@eeacms/volto-arcgis-block/constants';

const customBlocks = (config) => ({
  ...config.blocks.blocksConfig,
  [ARCGIS_BLOCK]: {
    ...config.blocks.blocksConfig[ARCGIS_BLOCK],
    styles: {
      ...config.blocks.blocksConfig[ARCGIS_BLOCK]?.styles,
      land: {
        title: 'Land style',
        customClass: 'land',
      },
    },
  },
@import url('maps.less');
.land { // <-- Wrap your design inside a class with the name you used in customClass
    .map {
        width: 100%;
        height: 600px;
        padding: 0;
        margin: 0;
    }

    .esri-view .esri-view-surface--inset-outline:focus::after {
        outline: none !important;
    }

    .esri-component.esri-zoom.esri-widget {
        margin-bottom: 0;
        box-shadow: none;
    }
}
Note: If the style selector does not show your new style, try to change the order of the declaration of the addons in package.json, giving preference to volto-arcgis-block
"addons": [
    "@eeacms/volto-arcgis-block",
    "@eeacms/volto-clms-theme"
  ],

develop to master. The pull request status checks correlated to the branch and PR Jenkins jobs need to be processed successfully. 1 review from a github user with rights is mandatory.master branch, which is protected from direct commits, only allowing pull request merge commits.continuous-integration/jenkins/branch link goes to the Jenkins job execution webpage.eeacms/gitflow docker image, specifically js-release.sh script. It uses the release-it tool.package.json. The new version must not be already present in the tags/releases of the repository, otherwise it will be automatically increased by the script. Any changes to the version will trigger a CHANGELOG.md re-generation.CHANGELOG.md file.You need to first install the release-it client.
npm install -g release-it
Release-it uses the configuration written in the .release-it.json file located in the root of the repository.
Release-it is a tool that automates 4 important steps in the release process:
package.json ( increased from the current version in package.json)CHANGELOG.md automatic generation from commit messages ( grouped by releases )To configure the authentification, you need to export GITHUB_TOKEN for GitHub
export GITHUB_TOKEN=XXX-XXXXXXXXXXXXXXXXXXXXXX
To configure npm, you can use the npm login command or use a configuration file with a TOKEN :
echo "//registry.npmjs.org/:_authToken=YYYYYYYYYYYYYYYYYYYYYYYYYYYYYY" > .npmrc
There are 3 yarn scripts that can be run to do the release
Automatically calculates and presents 3 beta versions - patch, minor and major for you to choose ( or Other for manual input).
? Select increment (next version):
❯ prepatch (0.1.1-beta.0)
  preminor (0.2.0-beta.0)
  premajor (1.0.0-beta.0)
  Other, please specify...
Same as yarn release-beta, but with premajor version pre-selected.
Generic command, does not automatically add the beta to version, but you can still manually write it if you choose Other.
Do not use release-it tool on master branch, the commit on CHANGELOG.md file and the version increase in the package.json file can't be done without a PULL REQUEST.
Do not keep Pull Requests from develop to master branches open when you are doing beta releases from the develop branch. As long as a PR to master is open, an automatic script will run on every commit and will update both the version and the changelog to a production-ready state - ( MAJOR.MINOR.PATCH mandatory format for version).
See DEVELOP.md.
FAQs
volto-arcgis-block: Volto add-on
The npm package @eeacms/volto-arcgis-block receives a total of 229 weekly downloads. As such, @eeacms/volto-arcgis-block popularity was classified as not popular.
We found that @eeacms/volto-arcgis-block demonstrated a healthy version release cadence and project activity because the last version was released less than a year ago. It has 10 open source maintainers collaborating on the project.
Did you know?

Socket for GitHub automatically highlights issues in each pull request and monitors the health of all your open source dependencies. Discover the contents of your packages and block harmful activity before you install or update your dependencies.

Security News
Bun 1.2 enhances its JavaScript runtime with 90% Node.js compatibility, built-in S3 and Postgres support, HTML Imports, and faster, cloud-first performance.

Security News
Biden's executive order pushes for AI-driven cybersecurity, software supply chain transparency, and stronger protections for federal and open source systems.

Security News
Fluent Assertions is facing backlash after dropping the Apache license for a commercial model, leaving users blindsided and questioning contributor rights.