Security News
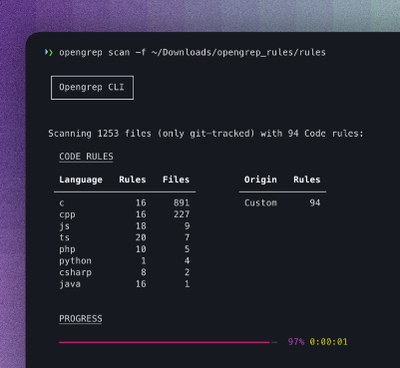
Opengrep Emerges as Open Source Alternative Amid Semgrep Licensing Controversy
Opengrep forks Semgrep to preserve open source SAST in response to controversial licensing changes.
@frontegg/angular
Advanced tools
npm install @frontegg/angular
FronteggAppModule to AppModuleimport { BrowserModule } from '@angular/platform-browser';
import { NgModule } from '@angular/core';
import { AppRoutingModule } from './app-routing.module';
import { AppComponent } from './app.component';
import { CommonModule } from '@angular/common';
import { FronteggAppModule } from '@frontegg/angular';
@NgModule({
declarations: [AppComponent],
imports: [
CommonModule,
BrowserModule,
AppRoutingModule,
FronteggAppModule.forRoot(
{
contextOptions: {
baseUrl: 'https://[YOUR_SUBDOMAIN].frontegg.com'
},
// Replace this with your app logo 👇
headerImage: 'https://assets.frontegg.com/public-frontegg-assets/acme-logo.svg';
}
),
],
bootstrap: [AppComponent],
})
export class AppModule { }
And wrap your application with frontegg-app selector to make sure you have the right context
/app.component.html

<frontegg-app>
  <div>
    <router-outlet></router-outlet>
  </div>
</frontegg-app>
FronteggAppService.
You can access the whole authentication state via the FronteggAppService.
To have an access to memoized authentication substates like user state, SSO state, MFA state, etc.
use FronteggAppAuthService as in the following sample:import { Component, OnInit } from '@angular/core';
import { FronteggAppAuthService, AuthState } from '@frontegg/angular';
@Component({
selector: 'app-root',
template: `<div *ngIf="authenticated">
<img src={{user?.profilePictureUrl}} alt={{user?.name}} />
<div>User name: {{user?.name}}</div>
</div>`,
styleUrls: ['./app.component.scss'],
})
export class AppComponent implements OnInit {
authenticated?: boolean;
user?: AuthState['user'] | null;
constructor(private fronteggAppAuthService: FronteggAppAuthService) {
this.user
}
ngOnInit(): void {
this.fronteggAppAuthService?.isAuthenticated$.subscribe((isAuthenticated) => {
this.authenticated = isAuthenticated
})
this.fronteggAppAuthService?.userState$.subscribe((user) => {
this.user = user
})
}
}
import { NgModule } from '@angular/core';
import { Routes, RouterModule } from '@angular/router';
import { EmptyAppComponent } from './empty/empty.component';
import { FronteggAuthGuard, connectFronteggRouter } from '@frontegg/angular';


const routes: Routes = connectFronteggRouter([
  { path: '', component: EmptyAppComponent },
  { path: 'test-private-route', canActivate: [FronteggAuthGuard], component: EmptyAppComponent },
  { path: '**', component: NotFoundComponent },
]);

@NgModule({
  imports: [RouterModule.forRoot(routes)],
  providers: [],
  exports: [RouterModule],
})
export class AppRoutingModule {}
We are all set. Let's run the application and see Frontegg in action.
npm run serve
Great, Frontegg is now integrated with your app!
Login and logout routes have been added to your app:
Signup screen will be at http://localhost:4200/account/sign-up
Login screen will be at http://localhost:4200/account/login
If you are already logged in, go to http://localhost:4200/account/logout and log out.
Give it a try by now by signing up & logging in.
Give it a try now! Open http://localhost:8080/account/sign-up and sign up with your first user.
In order to allow your end users to control the Security Settings, Profile, Team Management and more, the next step will be to embed the Admin Portal into your application.
For Frontegg admin portal integration we will import theFronteggAppService from the frontegg-app package and use showAdminPortal
method when clicking on the relevant button.
import { Component, OnInit } from '@angular/core';
import { FronteggAppService } from '@frontegg/angular';

@Component({
  selector: 'app-root',
  templateUrl: './app.component.html',
  styleUrls: ['./app.component.scss'],
})
export class AppComponent implements OnInit {

  constructor(private fronteggAppService: FronteggAppService) { }

  showApp(): void {
    this.fronteggAppService?.showAdminPortal()
  }
}
FAQs
Frontegg Angular Frontegg is a web platform where
The npm package @frontegg/angular receives a total of 719 weekly downloads. As such, @frontegg/angular popularity was classified as not popular.
We found that @frontegg/angular demonstrated a healthy version release cadence and project activity because the last version was released less than a year ago. It has 3 open source maintainers collaborating on the project.
Did you know?

Socket for GitHub automatically highlights issues in each pull request and monitors the health of all your open source dependencies. Discover the contents of your packages and block harmful activity before you install or update your dependencies.

Security News
Opengrep forks Semgrep to preserve open source SAST in response to controversial licensing changes.

Security News
Critics call the Node.js EOL CVE a misuse of the system, sparking debate over CVE standards and the growing noise in vulnerability databases.

Security News
cURL and Go security teams are publicly rejecting CVSS as flawed for assessing vulnerabilities and are calling for more accurate, context-aware approaches.