Security News
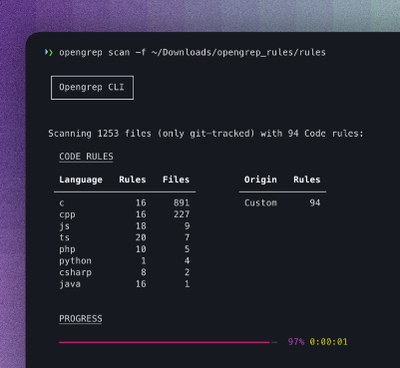
Opengrep Emerges as Open Source Alternative Amid Semgrep Licensing Controversy
Opengrep forks Semgrep to preserve open source SAST in response to controversial licensing changes.
@genesiscommunitysuccess/custom-elements-lsp
Advanced tools
TypeScript plugin to enable Intellisense in custom element tagged templates
The Genesis Global Community Success initiative is committed to open-sourcing select technologies that we believe the open-source community would benefit from.
Install this TypeScript plugin in your project to enhance your LSP enabled editor with IntelliSense handling for web component custom elements. This includes: autocompletion, diagonstics, and jump to definition.
| Editor | Completions | Diagnostics | Quickinfo | Info |
|---|---|---|---|---|
| VSCode | :white_check_mark: | :white_check_mark: | :white_check_mark: | Requires configuration to use local tsserver instance. Setup |
| Vim/NeoVim | :white_check_mark: | :white_check_mark: | :white_check_mark: | Requires configuration as an LSP client for TypeScript. Setup |
| JetBrains (IntelliJ/Webstorm/etc...) | :heavy_minus_sign: | :white_check_mark: | :x: | JetBrains IDEs currently only have partial support as an LSP client. Setup |
Any editor/IDE configured as an LSP client using the instance of tsserver which this plugin is installed to should be compatible.
Adding the LSP to your project takes less than 5 minutes. Follow along with our Setup Walkthrough Video, try our pre-setup Example Project, and see the Changeset required to enable the LSP in the example project.


Quicklook information is also provided, as well as IntelliSense for standard HTML elements. As previously stated, you can use any LSP enabled editor, such as Vim/NeoVim with LSP plugins for example.


There is an additional companion plugin which enables functionality when working with FAST.

Follow the readme of the linked plugin to set that up too if required.
These instructions are for setting up the LSP in your application. If you are wanting to set up the LSP test it or contribute to it then go to this section.
To use this plugin you have a version of typescript as part of the project, located inside of the node_modules.
npm i @genesiscommunitysuccess/custom-elements-lsp --save-dev
tsconfig.json. The following is an example shape, see below for full explanations.{
"compilerOptions": {
"plugins": [
{
"name": "@genesiscommunitysuccess/custom-elements-lsp",
"srcRouteFromTSServer": "configure this to set the relative path between your project route and your `tsserver.js`",
"designSystemPrefix": "configure this to handle a library of components with a prefix",
"parser": {
"timeout": 2000,
"src": "configure this to define the source code to parse",
"dependencies": [
"configure these globs to find manifest files from your dependencies",
"and use the ! pattern to ignore manifests"
]
},
"plugins": ["set plugins here!"]
}
]
}
}
See here for an example.
ES2015 or later in your tsconfig.json.Base options.
| Option | Optional and Default | Explanation |
|---|---|---|
name | False | Need to set as @genesiscommunitysuccess/custom-elements-lsp to enable this plugin. |
srcRootFromTSServer | True ("../../../") | srcRouteFromTSServer is the relative path from the tsserver.js executable in your node modules, to your directory with the package.json where the project web root is located. This is likely to be node_modules/typescript/lib/tsserver.js hence we use ../../... WARNING: If you are using a monorepo pattern with workspaces, you must account for potential hoisting of the TypeScript library in the node_modules to a parent directory. |
designSystemPrefix | True (N/A) | Used to work with %%prefix%% to handle components registered as part of a design system. See here. |
plugins | True ([]) | Set of optional plugins you can add to the CEP to enhance its functionality. Specified plugins are applied in order. |
Parser options. These control the analysis of the source code to understand semantics such as whether a custom element has a property or not. This is not controlling the LSP working with the html in the templates to understand whether there are diagnostic issues, or to aid with completion suggestions.
| Option | Optional and Default | Explanation |
|---|---|---|
src | True ("src/**/*.{js,ts}") | The glob of the source files in the current project to analyze live. |
timeout | True (2000) | Time in milliseconds to debounce calls between running the analyzer on the source files. The lower the time the more responsive the LSP will be to changes in the source code but the more resources it will use. |
dependencies | True ([]) | An array of strings of globs that find custom-elements.json from library dependencies to use with the LSP. Libraries will ship production code with which the analyzer will not be able to parse, so the libraries need to ship the manifest generated from the analyzer. An example default you could use to load all files would be ["node_modules/**/custom-elements.json","!**/@custom-elements-manifest/**/*"] which will find all of the manifests in your dependencies, but ignore the test manifests from the analzyer dependency itself. |
fastEnable | True (disabled) | Enables Microsoft FAST parsing of local components. You need to enable the plugin too for full functionality |
Only the src files are watched for changes to update the analyzer, if you update the dependencies containing manifest files you must restart the LSP for it to be aware of the changes.
WARNING: If you are using a monorepo pattern with workspaces, you must account for potential hoisting of the TypeScript library in the node_modules to a parent directory. The path of src and dependencies will be relative to the path created from the typescript install location and the srcRouteFromTSServer config option.
{
  "compilerOptions": {
    "plugins": [
      {
        "name": "@genesiscommunitysuccess/custom-elements-lsp",
        "srcRouteFromTSServer": "../../..",
        "designSystemPrefix": "example",
        "parser": {
          "fastEnable": true,
          "timeout": 2000,
          "dependencies": [
            "node_modules/example-lib/**/custom-elements.json",
            "!**/@custom-elements-manifest/**/*"
          ]
        },
        "plugins": ["@genesiscommunitysuccess/cep-fast-plugin"]
      }
    ]
  }
}
The above configuration would set the following:
example as the design system, so any component prefix like that would be of the pattern example-X, such as example-button.plugins array.example-lib dependency, and ignore the manifests from @custom-elements-manifest directory.There is current support for enhanced FAST handing (syntax such as @event on the template definitions). To enable this you'll need perform the following steps:
"fastEnable": true parser option in your tsconfig.json.@genesiscommunitysuccess/cep-fast-plugin to your project with your package manager.plugins array in your main config block in your tsconfig.json. See the example at the top of the page.You just need to setup VSCode to use your local typescript install as by default it will try and use a version of typescript it is bundled with.
.vscode in the root of the monorepo. Inside of that create a file called settings.json. Then fill it with the following contents:{
"typescript.tsdk": "node_modules/typescript/lib"
}
You can see an example of this in this repository - ./example/.vscode/settings.json.
If you already have that file and directory because you've created your own project config, then you can simply add the key/value pair from the json block into your existing config.
Advanced: If npm has hoisted your typescript install, ensure the path you configure accounts for that (ensure
typescript.tdskpoints to thelibdirectory of the project typescript install).
Launch VSCode on the root directory of the monorepo (so in the folder structure you'll have .vscode directory from step 1 at the root). You can do this via the GUI or if you've installed VSCode on your path you can navigate to the root and run code ..
Ensuring you have a typescript file open, open the command palette (Ctrl/Cmd + Shift + P) and search for TypeScript: Select Typescript Version...

If you don't see this option then ensure you have a
.tsfile open.

If you don't see this option then ensure that you've opened the project in VSCode that has the
.vscodedirectory from step 1 at the root.
If you have an LSP setup for typescript this should work straight away using the project's TypeScript. There are lots of different ways you can configure NeoVim/Vim as an LSP client, configuring that is out of the scope of these instructions.
This section covers all of JetBrains IDEs, such as WebStorm and IntelliJ. Currently there is only partial support for the CEP.
tsserver in their IDEs.To use the LSP in your JetBrains IDE.

Typescript settings in the Languages & Frameworks settings, and ensure that the typescript option is set to the node_modules/typescript of your local project, as shown in the image. This may be the default already, in which case you don't need to do anything. You'll also want to enable at least the three options which are enabled in the image below.

Please note the location and appearance of menus may differ between IDEs and versions.
designSystemPrefix is used to specify how to handle custom elements which are defined but exported as an element registry function, and later registered against a design system with a specific prefix. An example of this is FAST component libraries. Export these with the magic string %%prefix%%- at the start of the tagname and then designSystemPrefix will override the %%prefix%%.
In the config of this repository it is set to example because we use the example prefix as set in ./example/src/components.ts. An example of a component exported in this way can be found in the ./example/src/components/button/ directory.
If the results of the LSP are not what you're expecting (e.g. incorrect or missing information) then it may be because the source and dependencies paths have an issue, and the plugin is not able to correctly find the files to parse.
You can generate a copy of the manifest file that the plugin is using by running the analyzer executable script which is provided with this plugin with the custom-elements-analyze command.
package.json to execute the command. For example:{
"scripts": {
"lsp:analyze": "custom-elements-analyze --tsconfig=./src/tsconfig.json",
},
}
The script currently takes an optional argument:
--tsconfig - the path to the tsconfig.json file to use. Defaults to process.cwd().--fastEnable is set from the plugin config.This package.json needs to be the same location on the file system that the srcRouteFromTSServer relative path gets you to, as explained in the setup section.
npm run lsp:analyze.ce.json to see what components have issues, or are missing from the manifest.tsconfig.json to fix the issue in the LSP plugin.If you are still running into issues then you can spend time verifying that the debugging analyzer script is getting the same view as the CEP itself.
Setup Logging section from the contributing document.Info 32 [14:43:25.686] [CE] Analyzing and updating manifest. Config: ...[log] Analyzing and updating manifest. Config: ...Thanks for taking interest in contributing to the Custom Elements Plugin. See the contributing guidelines (CONTRIBUTING.md) at the root of the monorepo.
See here.
FAQs
TypeScript plugin to enable Intellisense in custom element tagged templates
The npm package @genesiscommunitysuccess/custom-elements-lsp receives a total of 221 weekly downloads. As such, @genesiscommunitysuccess/custom-elements-lsp popularity was classified as not popular.
We found that @genesiscommunitysuccess/custom-elements-lsp demonstrated a healthy version release cadence and project activity because the last version was released less than a year ago. It has 1 open source maintainer collaborating on the project.
Did you know?

Socket for GitHub automatically highlights issues in each pull request and monitors the health of all your open source dependencies. Discover the contents of your packages and block harmful activity before you install or update your dependencies.

Security News
Opengrep forks Semgrep to preserve open source SAST in response to controversial licensing changes.

Security News
Critics call the Node.js EOL CVE a misuse of the system, sparking debate over CVE standards and the growing noise in vulnerability databases.

Security News
cURL and Go security teams are publicly rejecting CVSS as flawed for assessing vulnerabilities and are calling for more accurate, context-aware approaches.