
Product
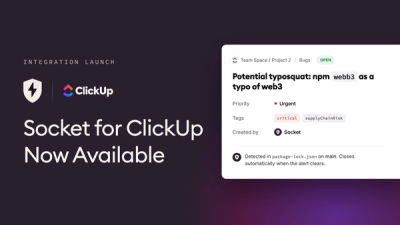
Socket for ClickUp Is Now Available
Create ClickUp tasks from Socket alerts, automate ticketing with custom rules, and keep alert and task status synchronized.
By Jeppe Hasseriis - Aug 26, 2026
@icedq/mcp-server
Advanced tools
MCP server for iceDQ Data Reliability Platform — 48 tools for validation, reconciliation, duplicate detection, scheduling, and data exploration.

Connect your AI assistant to the iceDQ Data Reliability Platform
Website • Documentation • Support • Privacy Policy



The iceDQ MCP Server lets you manage your entire data quality lifecycle through conversation with an AI assistant. Ask it to explore your data sources, create validation rules, run reconciliations, monitor executions, and analyze results — no UI switching required.
48 tools covering the full data quality lifecycle, grouped by what they do (see
manifest.json for the exact tool names and descriptions the assistant calls):
| Category | Tools | What you can do |
|---|---|---|
| Data Exploration | 8 | Browse workspaces, connections, databases, schemas, tables, and columns; verify a connection is reachable |
| Data Profiling & AI Suggestions | 3 | Pull real sample rows, get null/uniqueness/pattern stats per column, and get AI-suggested checks from that profile |
| Rule Creation | 6 | Create any of the five rule types — including AI-suggested join keys and column mappings before building a reconciliation rule |
| Rule Management | 3 | Search/filter existing rules, inspect full configuration, and update checks, source/target, or join keys |
| Workflows | 4 | Chain rules into a workflow and adjust membership later |
| Schedules & Automation | 6 | Set up one-time/daily/weekly schedules, add more jobs later, trigger on demand, review run history |
| Execution & Monitoring | 4 | Run a rule or workflow, poll it to completion, and pull per-activity results and history |
| Results & Exception Reporting | 2 | Get the specific failing rows and reasons, or a link to view the report in the iceDQ UI |
| Organization | 5 | Organize rules/workflows into folders and track the async move operations |
| Reusable Parameters | 3 | Define reusable thresholds/date ranges/reference values, including bulk-loading from CSV |
| Data Warehouse Analytics | 3 | Ask natural-language questions about DQ history via schema-validated structured queries (no raw SQL) |
(The 48th tool, get_guidance, isn't listed above — the assistant calls it internally before complex multi-step
operations; it's not something you ask for directly.)
Per the v1.0.0 release notes:
| Client | Support | Setup guide |
|---|---|---|
| Claude Desktop | ✅ MCP Bundle | Step-by-step |
| VS Code + GitHub Copilot Chat | ✅ MCP client | Step-by-step |
| VS Code + Claude Code | ✅ MCP client | Step-by-step |
| Cursor | ✅ MCP client | Step-by-step |
| Windows | ✅ Tested | — |
| macOS | ✅ Tested | — |
| Node.js | 18.x or higher | Only needed if you launch via npx — Claude Desktop's .mcpb path doesn't |
Recommended AI model: Claude Sonnet 4 or higher, for the most accurate rule creation and workflow understanding.
Every install method below needs the same values from your iceDQ instance. See the Credentials Guide for exactly where to find each one in the iceDQ UI, and the Authentication Guide for how the two auth modes differ.
| Value | Env var | Required for | Example |
|---|---|---|---|
| Base URL | ICEDQ_BASE_URL | Both modes | No default — always your own instance URL |
| Realm | ICEDQ_REALM | Both modes | icedq or iam.icedq |
| Client ID | ICEDQ_CLIENT_ID | Both modes | — |
| Client Secret | ICEDQ_CLIENT_SECRET | username_password only | — |
| Username | ICEDQ_USERNAME | username_password only | — |
| Password | ICEDQ_PASSWORD | username_password only | — |
| Tokens file path | TOKENS_PATH | access_token only | — |
| Organization ID | ICEDQ_ORG_ID | Both modes | org-icedq or org-iam.icedq |
Optional: VERIFY_SSL (default true; set "false" only for self-signed certs), REQUEST_TIMEOUT (default 60
seconds), DEBUG (default false).
Base URL has no default. Every organization runs its own iceDQ instance — the
https://app.icedq.netvalue used throughout this guide's examples is illustrative only, not a shared cloud endpoint. Always replace it with your own instance's URL.
If you're launching via
npx(every client below except Claude Desktop's packaged extension), also setNODE_OPTIONS=--use-system-cain theenvblock — this is in every official config example and avoids TLS errors on machines with a corporate root CA installed.
Jump to your client:
Each section below is a condensed quick-start. For the full walkthrough with screenshots and troubleshooting, follow the linked guide on docs.icedq.com.
📖 Full guide: Setup in Claude Desktop
Two paths — Path A (recommended) installs a packaged .mcpb extension with a settings form and stores your
password in your OS keychain; Path B hand-edits a config file and needs Node.js 18+.
Path A: Download the .mcpb from the Releases page, then
in Claude Desktop go to Settings → Extensions → Install Extension and select the file. Fill in the credentials
form that appears and click Save.
Path B: Edit claude_desktop_config.json (Windows: %APPDATA%\Claude\claude_desktop_config.json,
macOS: ~/Library/Application Support/Claude/claude_desktop_config.json):
{
  "mcpServers": {
    "icedq": {
      "command": "npx",
      "args": ["-y", "@icedq/mcp-server"],
      "env": {
        "ICEDQ_BASE_URL": "https://app.icedq.net",
        "ICEDQ_REALM": "icedq",
        "ICEDQ_CLIENT_ID": "your-client-id",
        "ICEDQ_CLIENT_SECRET": "your-client-secret",
        "AUTH_TYPE": "username_password",
        "ICEDQ_USERNAME": "your-username",
        "ICEDQ_PASSWORD": "your-password",
        "ICEDQ_ORG_ID": "your-org-id"
      }
    }
  }
}
Fully quit and reopen Claude Desktop (closing the window isn't enough), then verify with List my iceDQ workspaces.
📖 Full guide: Setup in VS Code & Cursor
Requires Node.js 18+ and the GitHub Copilot Chat extension, installed and signed in.
Ctrl+Shift+P / Cmd+Shift+P) → MCP: Open user configuration → opens mcp.json.{
"servers": {
"icedq": {
"command": "npx",
"args": ["-y", "@icedq/mcp-server"],
"env": {
"ICEDQ_BASE_URL": "https://app.icedq.net",
"ICEDQ_REALM": "icedq",
"ICEDQ_CLIENT_ID": "your-client-id",
"ICEDQ_CLIENT_SECRET": "your-client-secret",
"AUTH_TYPE": "username_password",
"ICEDQ_USERNAME": "your-username",
"ICEDQ_PASSWORD": "your-password",
"ICEDQ_ORG_ID": "your-org-id",
"NODE_OPTIONS": "--use-system-ca"
}
}
}
}
Ctrl+S/Cmd+S) — VS Code shows a Start option next to the icedq entry. Click it.Ctrl+Alt+I/Cmd+Ctrl+I): List my iceDQ workspaces.⚠️ This file stores your password in plain text. Don't commit
.vscode/mcp.jsonto git if you're using workspace-scoped settings.
📖 Full guide: Setup with Claude Code
Use this instead of the Copilot Chat guide if you have a Claude subscription (Pro/Max/Team/Enterprise) or an
Anthropic API key rather than a Copilot subscription. Requires Node.js 18+ and the Claude Code for VS Code
extension published by Anthropic (anthropic.claude-code) — skip third-party wrappers.
Path A — edit .claude.json (home directory: Windows %USERPROFILE%\.claude.json, macOS/Linux
~/.claude.json):
{
  "mcpServers": {
    "icedq": {
      "command": "npx",
      "args": ["-y", "@icedq/mcp-server"],
      "env": {
        "ICEDQ_BASE_URL": "https://app.icedq.net",
        "ICEDQ_REALM": "icedq",
        "ICEDQ_CLIENT_ID": "your-client-id",
        "ICEDQ_CLIENT_SECRET": "your-client-secret",
        "AUTH_TYPE": "username_password",
        "ICEDQ_USERNAME": "your-username",
        "ICEDQ_PASSWORD": "your-password",
        "ICEDQ_ORG_ID": "your-org-id",
        "NODE_OPTIONS": "--use-system-ca"
      }
    }
  }
}
Path B — CLI (npm install -g @anthropic-ai/claude-code first if you don't have it):
claude mcp add icedq \
  --scope user \
  --env ICEDQ_BASE_URL=https://app.icedq.net \
  --env ICEDQ_REALM=icedq \
  --env ICEDQ_CLIENT_ID=<your-client-id> \
  --env ICEDQ_CLIENT_SECRET=<your-client-secret> \
  --env AUTH_TYPE=username_password \
  --env ICEDQ_USERNAME=<your-username> \
  --env ICEDQ_PASSWORD=<your-password> \
  --env ICEDQ_ORG_ID=<your-org-id> \
  --env NODE_OPTIONS=--use-system-ca \
  npx --yes @icedq/mcp-server
(Windows PowerShell: use ` for line continuation instead of \, or put it all on one line.)
Verify either path with claude mcp list (should show icedq), reload VS Code
(Developer: Reload Window), then ask in the Claude Code panel: List my iceDQ workspaces.
📖 Full guide: Setup in VS Code & Cursor
Cursor has built-in MCP support — no extra extension needed. Requires Node.js 18+.
Cmd+,/Ctrl+,) → search Tools & MCP → Add Custom MCP → opens mcp.json
(macOS: ~/.cursor/mcp.json, Windows: %USERPROFILE%\.cursor\mcp.json).{
"mcpServers": {
"icedq": {
"command": "npx",
"args": ["-y", "@icedq/mcp-server"],
"env": {
"ICEDQ_BASE_URL": "https://app.icedq.net",
"ICEDQ_REALM": "icedq",
"ICEDQ_CLIENT_ID": "your-client-id",
"ICEDQ_CLIENT_SECRET": "your-client-secret",
"AUTH_TYPE": "username_password",
"ICEDQ_USERNAME": "your-username",
"ICEDQ_PASSWORD": "your-password",
"ICEDQ_ORG_ID": "your-org-id",
"NODE_OPTIONS": "--use-system-ca"
}
}
}
}
Cmd+L/Ctrl+L): List my iceDQ workspaces.If you'd rather not store a password in a config file, every client above also supports access token mode —
swap the username_password fields for:
"env": {
  "ICEDQ_BASE_URL": "https://app.icedq.net",
  "ICEDQ_REALM": "icedq",
  "ICEDQ_CLIENT_ID": "your-oauth-client-id",
  "AUTH_TYPE": "access_token",
  "TOKENS_PATH": "/full/path/to/icedq-tokens.json",
  "ICEDQ_ORG_ID": "your-org-id"
}
Generate the token file from iceDQ's Profile → Token Generation. See the Authentication Guide for the full walkthrough — the connector refreshes the token automatically and writes the new pair back to the same file.
Explore your data:
"List my iceDQ workspaces and show the connections in Production_DQ"
Profile a table:
"Fetch sample data from the Customers table and suggest quality checks"
Create a validation rule:
"Create a validation rule called Customer_Quality_Checks with those suggested checks"
Run and monitor:
"Execute Customer_Quality_Checks and show me the results"
Cross-source comparison:
"Compare row counts between SQL Server Orders and Snowflake FACT_ORDERS"
Reconciliation:
"Reconcile the Customers table between Oracle and Snowflake using email as the join key"
Analytics:
"Show me the top 5 rules that failed most often last week"
| Issue | Solution |
|---|---|
| Server/extension not appearing | Claude Desktop: fully quit and reopen. VS Code/Cursor: reload the window. Claude Code: claude mcp list |
| Authentication failed | Verify Client ID, Client Secret, username, and password by logging into iceDQ in your browser with the same values |
| No workspaces returned | Check ICEDQ_ORG_ID and confirm your user has workspace access |
| SSL certificate error | Set VERIFY_SSL to false (self-signed certs only — not for production) |
| Invalid JSON | One missing comma/quote breaks the config — validate at jsonlint.com |
| npm download blocked by corporate proxy | npm install -g @icedq/mcp-server, then set "command": "icedq-mcp-server" with empty args |
Each client's full guide (linked above) has an exhaustive troubleshooting section, including exact Debug Mode steps and log locations for that client.
Claude Desktop log file locations:
%APPDATA%\Claude\Logs\extensions\~/Library/Logs/Claude/extensions/access_token mode on shared machinesFull details: https://icedq.com/privacy-policy
| Channel | Contact |
|---|---|
| getsupport@icedq.com | |
| Documentation | docs.icedq.com |
| Website | icedq.com |
iceDQ Data Reliability Platform
End-to-end data reliability, powered by AI
icedq.com
FAQs
MCP server for iceDQ Data Reliability Platform — 48 tools for validation, reconciliation, duplicate detection, scheduling, and data exploration.
The npm package @icedq/mcp-server receives a total of 80 weekly downloads. As such, @icedq/mcp-server popularity was classified as not popular.
We found that @icedq/mcp-server demonstrated a healthy version release cadence and project activity because the last version was released less than a year ago. It has 2 open source maintainers collaborating on the project.
Product
Create ClickUp tasks from Socket alerts, automate ticketing with custom rules, and keep alert and task status synchronized.
Product
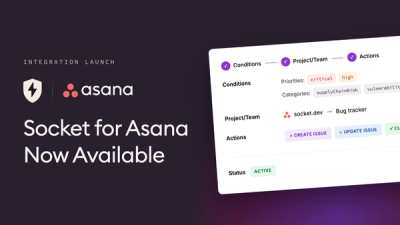
Create and manage Asana tasks directly from Socket alerts, with manual task creation, automated ticketing rules, and two-way sync.

Security News
Open VSX has removed three extension IDs from its malicious-extension list as the legitimate publishers they impersonated move to claim the names for themselves.