WP-Next
WP-Next is built with Next.js and WP-Node. It provides a modern React-based Admin Dashboard and utilities for building applications that interact directly with a WordPress database — no PHP required.
👉 View Full Documentation
Quick Demo
Run a ready-made WP-Next example using Docker:
docker run --rm --init -it --name wp-next-example -p 3000:3000 \
-v wp-next-example_public:/app/admin/public \
-v wp-next-example_db:/var/lib/mysql \
-v wp-next-example_html:/app/html \
rnagat/wp-next-example:latest
Visit http://localhost:3000/admin and log in with:
Username: wp
Password: wp
To stop and remove the running example container, use:
docker stop wp-next-example
Admin Dashboard
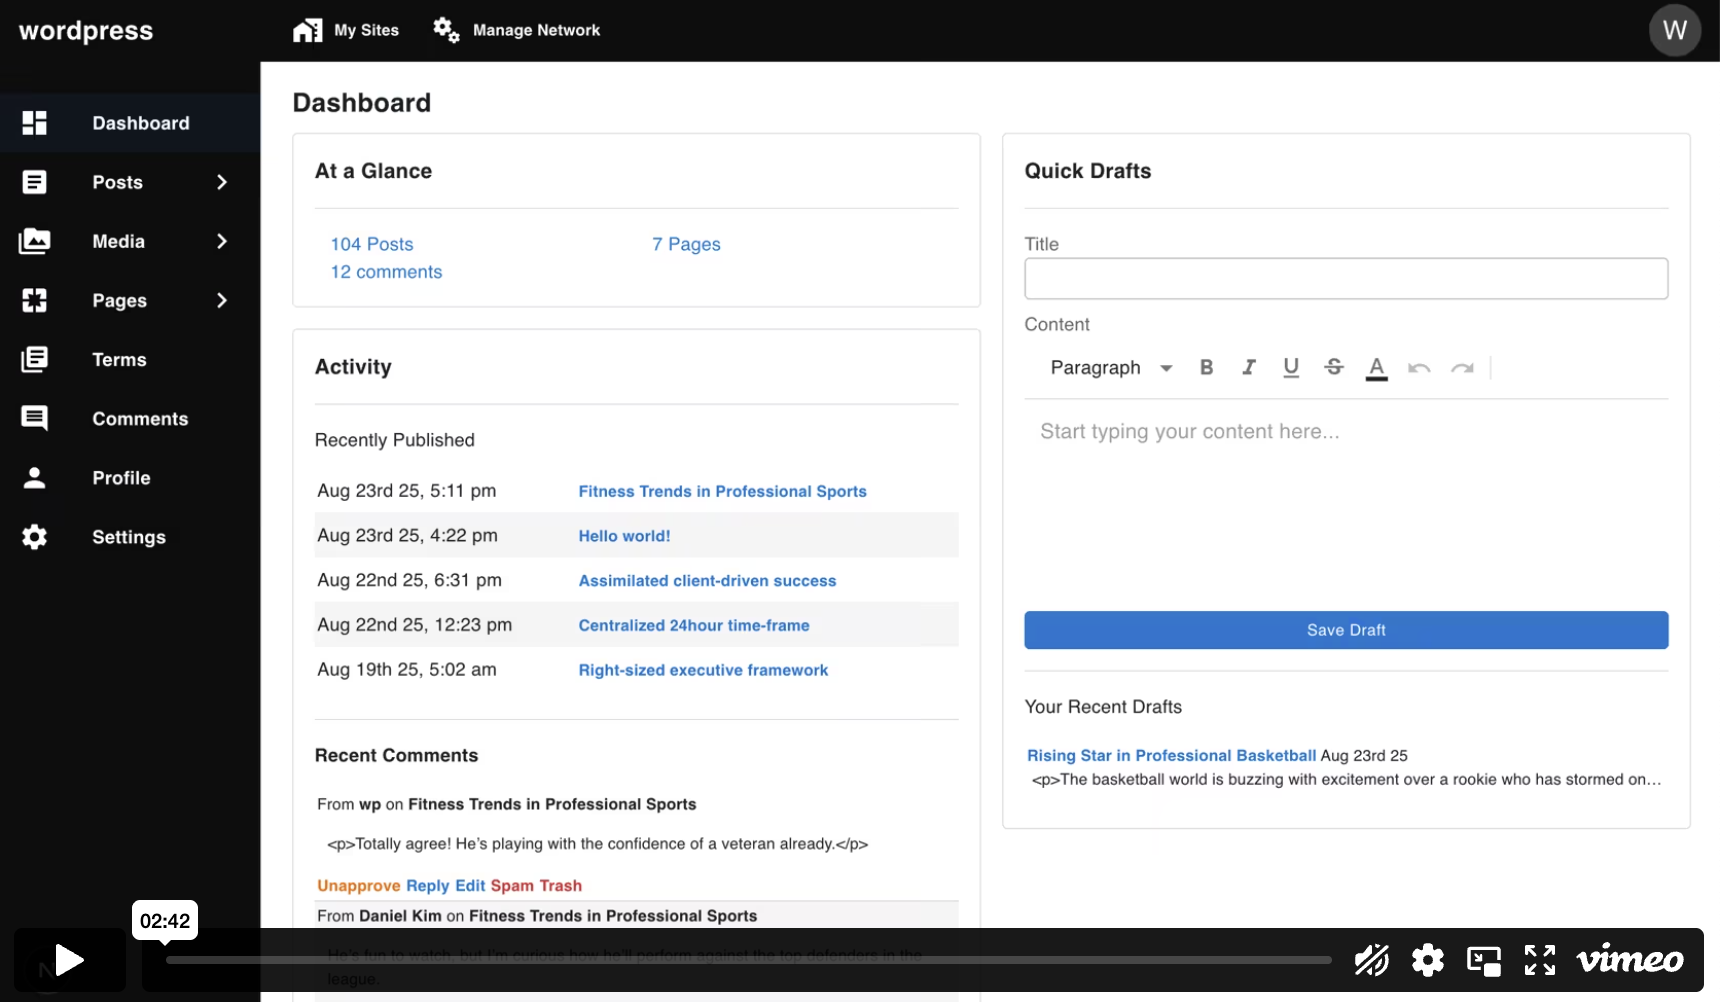
The main feature of WP-Next is the Admin Dashboard, a headless CMS that serves as an alternative to the traditional WordPress Admin Dashboard.
Out of the box, it includes:
- Posts & Pages
- Media
- Terms (Categories, Tags)
- Comments
- Profile & Settings
- Users and Roles
- Revisions
In multisite mode, it also supports:
- Sites
- Blogs (per-site content such as posts, media, comments)
Notes
Since WP-Next is entirely written in TypeScript and React, some WordPress features are not supported, including:
- WordPress Themes and appearance settings
- WordPress Block Editor (Gutenberg)
- WordPress template rendering APIs
- WordPress plugins
Core Libraries
Installation
Prerequisites
WP-Next requires a running WordPress database. If you don’t already have WordPress installed, see the Prerequisites section in the WP-Node installation guide for instructions on running it with Docker:
https://rnaga.github.io/wp-node/docs/getting-started/installation#prerequisites
Initialize Project (Admin Dashboard)
WP-Next provides a CLI tool to initialize the Admin Dashboard. Run the following command and follow the prompts:
npx @rnaga/wp-next-cli -- initAdmin
Example setup prompts you may see:
✔ Enter your database hostname: · localhost
✔ Enter your database port: · 33306
✔ Enter your database username: · wp
✔ Enter your database password: · **
✔ Enter your database name: · wordpress
✔ Is it a multi-site? · No
✔ Enter your static assets path: · public
✔ Enter your Admin URL: · http://localhost:3000
✔ Enter project path (What is your project named?): · admin
The CLI will automatically install and configure:
- A Next.js project (App Router enabled) for the Admin Dashboard
- Pages and layouts required by the Admin Dashboard
- Configuration files and the
_wp/hooks scaffolding
Run and Build the Admin Dashboard
Run in development mode:
npm run dev
Build and start for production:
npm run build
npm run start
For more on production deployment, refer to the Next.js deployment guide:
https://nextjs.org/docs/pages/getting-started/deploying
Hooks (Filter and Action)
WP-Next uses WP-Node hook system which is inspired by WordPress hooks but designed for TypeScript and Node.js. The system supports both filters (which transform data) and actions (which run side effects). Because WP-Node is TypeScript-first, hooks are type-safe and can be asynchronous — they are not directly compatible with WordPress core PHP hooks.
Key points:
- Filters: transform and return data; they may be async.
- Actions: perform side effects and do not return data.
- Hooks can be registered either with TypeScript decorators (static / application lifecycle) or with the functional HookCommand utilities (runtime / dynamic).
Frontend vs Backend hooks
When initialized, WP-Next generates a _wp/hooks directory where you can add your own hooks:
hooks/
├── client
│   └── index.tsx
└── server
    ├── admin-media.hook.ts
    ├── index.ts
    ├── nextauth-providers.hook.ts
    └── notifications.hook.ts
Frontend Hooks
Frontend hooks (place under _wp/hooks/client/) are bundled into the Admin UI and run in the browser. Use them to register UI extensions such as sidebar menus, custom admin pages, or client-side theming. Frontend hooks must contain only client-safe code (no direct access to the filesystem, process env secrets, or server-only Node APIs).
Backend Hooks
Backend hooks (place under _wp/hooks/server/) run inside the server-side application/context. Use them for server responsibilities like media upload handling, authentication providers, email sending, or other integrations that require Node APIs, credentials, or synchronous server-side state.
For more details about hooks, how they work, and usage examples, see the WP-Node hooks documentation:
https://rnaga.github.io/wp-node/docs/concepts-features/hooks
Custom Admin Pages
You can extend the Admin Dashboard by registering custom pages:
Below are minimal, illustrative examples (a page component and a frontend hook) you can copy into _wp/hooks/client/ and adapt to your project.
- Create a React component (
CustomPage.tsx) to render your page.
- Write a frontend hook (
menu-custom.hook.tsx) to add a sidebar menu and route.
- Register the hook in
_wp/hooks/client/index.tsx.
Example menu item route:
http://localhost:3000/admin/blog/custom
This allows you to build fully custom interfaces inside the Admin while reusing the WP-Next shell.
Example code (illustrative — example usage)
These snippets show one way to implement CustomPage.tsx and menu-custom.hook.tsx. Adapt imports, types, and capabilities to your project; they are examples, not production-ready code.
CustomPage.tsx
import React from "react";
import Box from "@mui/material/Box";
import Typography from "@mui/material/Typography";

export const CustomPage = () => {
  return (
    <Box sx={{ p: 2 }}>
      <Typography variant="h4" gutterBottom>
        Custom Page
      </Typography>

      <Typography paragraph>
        This is a simple custom admin page. Put your React UI here — forms,
        lists, editor components, etc.
      </Typography>

      <ul>
        <li>Example item 1</li>
        <li>Example item 2</li>
      </ul>
    </Box>
  );
};
menu-custom.hook.tsx
"use client";
import { filter as clientFilter } from "@rnaga/wp-next-core/decorators";
import { hook } from "@rnaga/wp-node/decorators/hooks";
import CircleIcon from "@mui/icons-material/Circle";
import { CustomPage } from "./CustomPage";
@hook("next_admin_custom_menu")
export class MenuCustomHook {
@clientFilter("next_admin_menu")
hookFilter(adminMenus: any[] = [], segment?: string) {
if (!["blog", "dashboard"].includes(segment || "")) {
return adminMenus;
}
const blogMenu = [
{
icon: <CircleIcon />,
displayOnSidebar: true,
component: <CustomPage />,
capabilities: ["read"],
label: "Custom Page",
path: `/${"blog"}/custom`,
},
];
return [...adminMenus, ...blogMenu];
}
}
index.tsx (register hooks)
import { getDefaultAdminHooks } from "@rnaga/wp-next-admin/client/utils";
import { MenuCustomHook } from "./menu-custom.hook";
export const hooks = [...getDefaultAdminHooks(), MenuCustomHook];
Summary and quick how-to
npm run dev
npm run build
npm run start
Example menu route: http://localhost:3000/admin/blog/custom
License
MIT