Zeplin CLI
Zeplin CLI tool analyzes your components’ source code and publish a high-level overview to be displayed in Zeplin to all developers in your team. You can either publish changes to your components manually, or better yet, you can always keep them in sync by running the Zeplin CLI tool as a step in your CI.
Connected Components
With the Connected Components feature, as a developer, you will now be able to connect components in your codebase to their design counterparts in Zeplin.
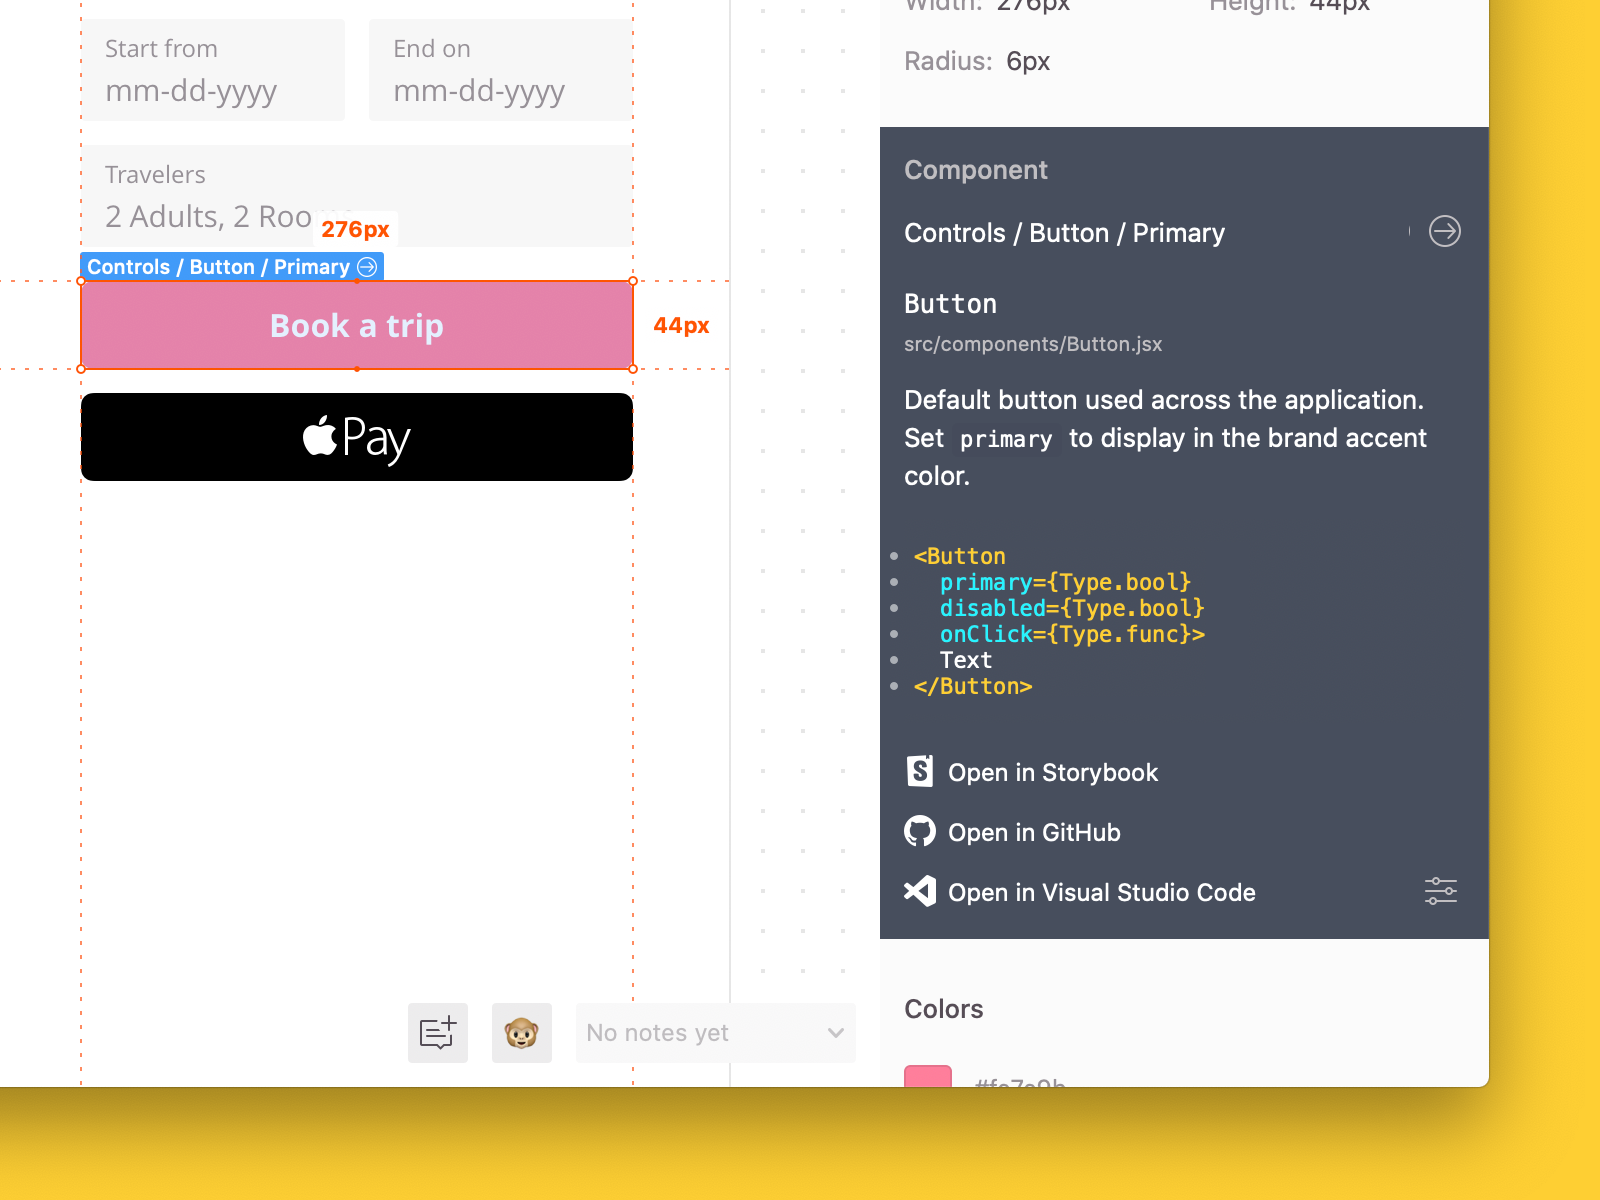
Once set up, while inspecting a design in Zeplin, you will be presented with a high-level overview of the component, including links to any source of documentation used by your team, like Storybook or GitHub.

Zeplin automatically collects your component documentation based on the platform/framework you’re working with; JSDoc and PropTypes for the React example above.
This high-level overview is completely flexible and can be tailored to your team’s needs. You can customize the description, the code snippet and add links to any source like your internal wiki or your design system documentation.
Here is a quick demo to easily engage this feature: https://zpl.io/connected-components-demo
To summarize the process:
- Create a
components.json file in your repository by using Zeplin Visual Studio Code extension. - Use
connect command to connect your codebase components as defined in the configuration file. For details, please refer to the configuration documentation
Installation
Install Zeplin CLI using npm.
npm install -g @zeplin/cli
Overview
zeplin connect [options]
| Options | Description | Default |
|---|
| -f, --file | Full path to components configuration file | .zeplin/components.json |
| -d, --dev | Activate development mode | false |
| -p, --plugin | NPM package name of a Zeplin CLI connect plugin | |
| -h, --help | Output usage information | |
| --verbose | Enable verbose logs | |
Connected Components Plugins
You can enhance your connected components by using plugins. Plugins can generate component descriptions, code snippets and special links for your components.
Plugins Developed by Zeplin
(*) - Since the language has no popular convention of component like React components, we have defined a sample component format for this language.
The plugin is only compatible with this component convention. Feel free to use these plugins as a base for a custom plugin compatible with your own codebase.
Check Custom Plugins below.
Plugin Usage
Install connect plugin using npm.
npm install -g @zeplin/cli-connect-react-plugin
Execute connect command using the plugin.
zeplin connect -p @zeplin/cli-connect-react-plugin
You can also fill plugins field in component configuration file with NPM package names and their custom configuration parameters to execute them without -p argument.
Advanced usage
Specify a custom path for components.json file.
zeplin connect -f path/to/components.json
You can use multiple configuration files and multiple plugins at once. In this case, the configuration files will be analyzed for both plugins.
zeplin connect -f path/to/components.json -f path/to/other/components.json -p plugin-npm-package-name -p other-plugin-npm-package-name
Custom Plugins
You can develop a custom plugin to extract/generate description and snippets of your code base.
See details about plugin development here.
Using on CI Pipeline
Zeplin CLI can make authentication using an access token instead of your Zeplin credentials. This is convenient to integrate connecting components into your CI pipeline.
- Get a CLI access token from your profile page.
- Set
ZEPLIN_ACCESS_TOKEN environment variable in your CI setup.
Alternatively, you can use this token in your local machine as well.
export ZEPLIN_ACCESS_TOKEN=<YOUR_ACCESS_TOKEN_HERE>
zeplin connect <options>
Contribution & Issue Tracking
See CONTRIBUTING.md for details.


