Product
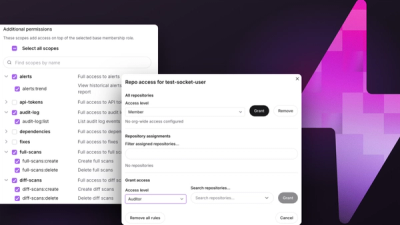
Introducing Repository Access Permissions and Custom Roles
Socket now supports Custom Roles and Repository Access Permissions so organizations can control who can access specific repositories and actions.
By Joe Werle - Jun 19, 2026
A CLI that generates a beautiful interactive terminal-based portfolio/resume from a YAML config
A CLI that generates a beautiful, interactive terminal-based portfolio/resume from a YAML config. Anyone can run npx clifolio @username to see your portfolio with animations, project showcases, and contact info — right in the terminal.
o to open project URLs or contact links in your browsernpx clifolio @younpx clifolio@latest init creates a config file for you# View someone's portfolio
npx clifolio @username
# View from a local YAML file
npx clifolio --file portfolio.yml
# Create your own portfolio config
npx clifolio@latest init
npx clifolio@latest init
This will interactively ask for your name, title, tagline, and GitHub username, then generate a clifolio.yml file.
Open clifolio.yml and fill in your skills, experience, projects, education, and contact info. See the Config Reference below for all available fields.
npx clifolio --file clifolio.yml
Make sure everything looks good before publishing.
This is how other people will access your portfolio from anywhere in the world.
clifolio.ymlclifolio.yml into the gist⚠️ The gist filename must be
clifolio.yml— this is how the CLI finds your portfolio.
Once your gist is live, anyone can view your portfolio by running:
npx clifolio @yourgithubusername
That's it! No servers, no hosting, no deployments. Your portfolio lives as a simple gist and is viewable from any terminal in the world.
When someone runs npx clifolio @username, the CLI:
clifolio.ymlUsage: clifolio [options] [command]
🖥️ View developer portfolios right in your terminal
Options:
-V, --version output the version number
-h, --help display help for command
Commands:
init Create a new clifolio.yml config file interactively
view [options] [source] View a portfolio in the terminal (default)
  -f, --file <path>     Path to local YAML config file
  -t, --theme <name>    Override theme (default, ocean, dracula, monokai, nord)
  --no-animation        Disable animations
| Key | Action |
|---|---|
← / h | Previous section |
→ / l | Next section |
o | Open link in browser |
q | Quit |
Create a clifolio.yml file with the following structure:
theme: ocean  # Options: default, ocean, dracula, monokai, nord
name: "Your Name"
title: "Your Title"
tagline: "Your tagline"

about: |
  A short bio about yourself...

skills:
  - name: TypeScript
    level: 95       # 0-100
  - name: React
    level: 90

experience:
  - company: "Company Name"
    role: "Your Role"
    period: "2022 - Present"
    description: "What you did..."

projects:
  - name: "Project Name"
    description: "What it does"
    tech: ["TypeScript", "React"]
    url: "https://github.com/you/project"
    stars: 100

education:
  - institution: "University"
    degree: "B.S. Computer Science"
    year: "2020"

contact:
  email: "you@example.com"
  github: "yourusername"
  linkedin: "yourusername"
  twitter: "yourusername"
  website: "https://yoursite.dev"
Five built-in color themes:
| Theme | Vibe |
|---|---|
default | Clean dark (One Dark Pro) |
ocean | GitHub-inspired blues |
dracula | Purple-accented dark |
monokai | Classic editor palette |
nord | Arctic, cool-toned |
Override with --theme:
npx clifolio@latest @username --theme dracula
# Install dependencies
npm install

# Build
npm run build

# Run locally
node dist/index.js --file examples/sample.yml

# Watch mode
npm run dev
MIT
FAQs
A CLI that generates a beautiful interactive terminal-based portfolio/resume from a YAML config
The npm package clifolio receives a total of 17 weekly downloads. As such, clifolio popularity was classified as not popular.
We found that clifolio demonstrated a healthy version release cadence and project activity because the last version was released less than a year ago. It has 1 open source maintainer collaborating on the project.
Did you know?

Socket for GitHub automatically highlights issues in each pull request and monitors the health of all your open source dependencies. Discover the contents of your packages and block harmful activity before you install or update your dependencies.
Product
Socket now supports Custom Roles and Repository Access Permissions so organizations can control who can access specific repositories and actions.
Product
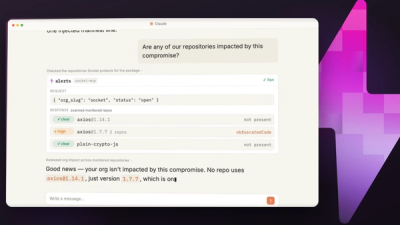
Socket MCP now lets AI assistants review org alerts, investigate threats using the Socket threat feed, and inspect package files in addition to dependency scoring.
Product
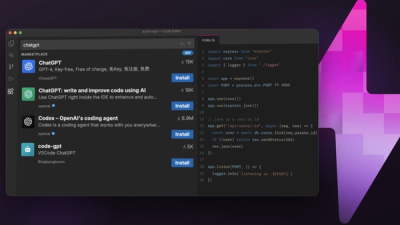
Socket Firewall blocks malicious VS Code and Open VSX extensions before install, protecting developers from compromised editor marketplaces.