
The Full Stack JAMstack in-a-box.
Bison is a starter repository created out of real-world apps at Echobind. It represents our current "Greenfield Web Stack" that we use when creating web apps for clients.
We're always improving on this, and welcome suggestions from the community!
Technology
Features
Conventions
- Don't copy/paste files, use generators and Hygen templates. Need to update the generator as your project evolves? they are all in the
_templates folder. - Use a single command to run Next, generate Nexus types, and GraphQL types for the frontend. By doing this you can ensure your types are always up-to-date.
- Don't manually write types for GraphQL responses... use the generated query hooks from GraphQL Codegen.
- All frontend pages are static by default. If you need something server rendered, just add
getServerSideProps like you would in any Next app.
Tradeoffs
- To reduce complexity, Bison avoids yarn workspaces and separate top-level folders. Think of your app a bit more like a traditional monolith, but with a separate frontend and API. This means that folders may be a little more "intermingled" than your used to.
- Currently, Bison only works on Vercel. We plan to add support for Netlify soon.
Alternatives
There are a few other projects that are rapidly maturing in the Full Stack JAMStack space.
RedwoodJS
Redwood is a very promising framework we've got our eye on. We took the concept of "Cells" directly from Redwood (though admittedly our version takes a bit more code!).
Blitz.js
Blitz is also very promising. Blitz is built on Next.js (which we love!) and takes a very different approach by attempting to "remove" the API layer using conventions provided by Next.js.
Like what we've added to Bison, both of these projects are driven by conventions. We may borrow concepts from Redwood and Blitz over time, and may even switch to one in the future as things continue to mature.
We hope Bison can provide a great jumping off point for new apps. Especially if you're the type that likes to see how everything is wired together and adapt the "framework" to your needs.
Getting Started
Create a new repo fom the Bison template.
Using yarn:
yarn create bison-app
Using npx:
npx create-bison-app
Configure Vercel
Make sure you have a Vercel account.
To run the app locally:
- Run
vercel or vc - Choose the appropriate scope / organization. If you don't see the organization, ask someone to invite you.
- If this is a new project, keep all the build defaults. If this is an existing project, choose "link to an existing project" when prompted.
- If setting up an existing project, run
vc env pull. This will sync your dev env vars and save them to .env.
Migrate the database
- Migrate the database with
yarn db:migrate. You'll be prompted to create the database if it doesn't exist:

If you'd like to change the database name or schema, change the DATABASE_URL in prisma/.env.
Run the app
From the root, run yarn dev. This will do the following:
- run
vc dev to run the frontend and serverless functions locally - start a watcher to generate the Prisma client on schema changes
- start a watcher to generate TypeScript types for GraphQL files
Recommended Dev Workflow
You're not required to follow this exact workflow, but we've found it gives a good developer experience.
API
- Generate a new GraphQL module using
yarn g:graphql. - Write a type, query, input, or mutation using Nexus
- Create a new request test using
yarn g:test:request - Run
yarn test to start the test watcher - Add tests cases and update schema code accordingly
- The GraphQL playground (localhost:3000/api/graphql) can be helpful to form the proper queries to use in tests.
types.ts and api.graphql should update automatically as you change files. Sometimes it's helpful to open these as a sanity check before moving on to the frontend code.
Frontend
- Generate a new page using
yarn g:page - Generate a new component using
yarn g:component - If you need to fetch data in your component, use a cell. Generate one using
yarn g:cell (TODO) - To generate a typed GraphQL query, simply add it to the component or page:
export const SIGNUP_MUTATION = gql`
  mutation signup($data: SignupInput!) {
    signup(data: $data) {
      token
      user {
        id
      }
    }
  }
`;
- Use the newly generated types from codegen instead of the typical
useQuery or useMutation hook. For the example above, that would be useSignupMutation. You'll now have a fully typed response to work with!
import { User, useMeQuery } from './types';
export const ME_QUERY = gql`
query me {
me {
id
email
}
}
`;
function noIdea(user: Partial<User>) {
console.log(user.email);
}
function fakeComponent() {
const { data, loading, error } = useMeQuery();
if (loading) return <Loading />;
return <Success user={data.user}>
}
Set up CI
This project uses GitHub Actions for CI.
To ensure your project can run on CI for E2E tests, you need to add a few ENV vars to GitHub Secrets.
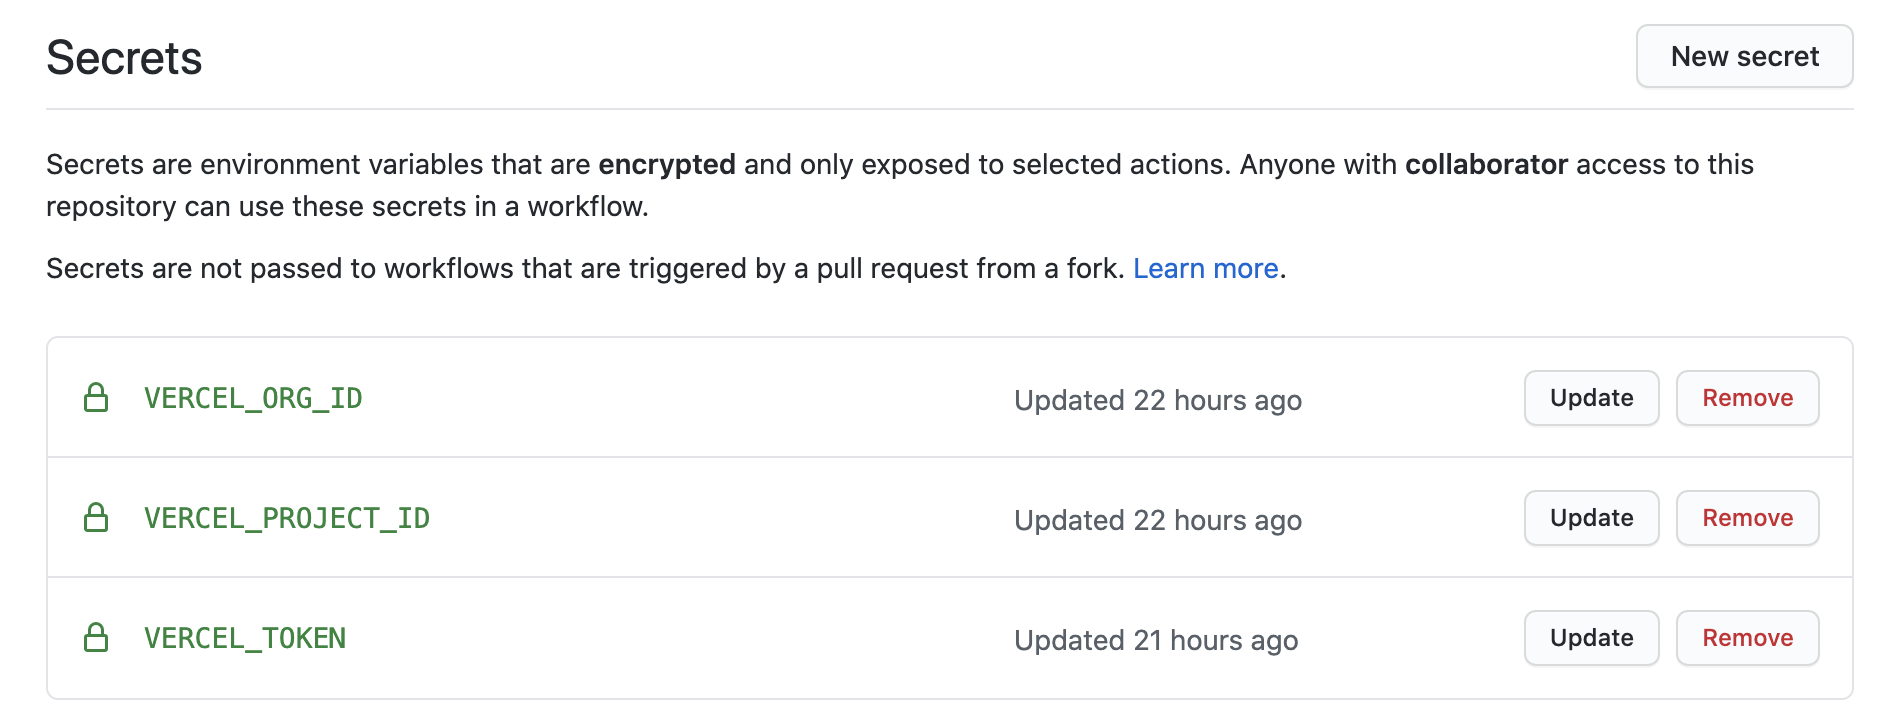
The Vercel project and org id, can be copied from .vercel/project.json. You can generate a token from https://vercel.com/account/tokens.
Setup Preview / Production Deployments
After tests pass, the app will deploy to Vercel. By default, every push creates a preview deployment. Merging to the main branch will deploy to staging, and pushing to the production branch will deploy to production. To configure deployments:
- Make sure you've set the variables above
- Configure the branches in the workflow:
## For a typical JAMstack flow, this should be your default branch.
## For a traditional flow that auto-deploys staging and deploys prod is as needed, keep as is
if: github.ref != 'refs/heads/production' # every branch EXCEPT production
FAQ
Where are the generated types?
TypeScript Types for GraphQL types, queries, and mutations are generated automatically and placed in ./types.ts.
VSCode can't find new types, even though they are in ./types.ts
Try reopening VSCode.


