
Build Status: 
HopJS
The RESTful API dynamic web apps crave.
Introduction
HopJS is a RESTful based declarative API framework for Node.js that:
- Can generate native APIs for Android, iPhone, iPad, JavaScript, and Shell
- Generates easy to use browser side API hooks
- Has a declarative testing interface, which can generate native unit tests in JavaScript and native API frameworks
- Generates it's own API documentation
- Supports intelligent server-side caching of results using Redis
- Supports event based APIs using Socket.io
- Enhanced APIs with optional declarative models
API Documentation
First, we simply define the interface you wish to expose
(either as static methods on an object or as a proper JavaScript class)
UserService={};
UserService.create=function(input,onComplete){
}
UserService.authenticate=function(input,onComplete){
}
Next, we use Hop to define the interface; this will expose the interface via a RESTful API
Hop.defineClass("UserService",UserService,function(api){
api.post("create","/user").demand("email").demand("username");
api.post("authenticate","/user/auth").demand("email").demand("username");
});
Hop.exposeAPI("/api/",app)
Now that we've done that we get a few things:
- We have our RESTful API
- HopJS generates a client side API we can use in our browser which will have the following definitions:
- UserService.create(input,onComplete)
- UserService.authenticate(input,onComplete)
So now our web-site has:
  # An API for UserService.create
  POST /api/user
  # An API for UserService.authenticate
  POST /api/user/authenticate
  # Documentation for our API as generated by HopJS with online unit tests
  GET /api/
  # A jQuery based client set of stubs for our API
  GET /api/api.js
  # A JSON definition of our API for client side stub generation
  GET /api/api.json
defineClass documenation
But we can also define the test cases for our new interface!
Hop.defineTestCase("UserService.authenticate",function(test){
    var validUser = { email:"test@test.com", username:"TestUser" };
    test.do("UserService.create").with(validUser).noError();
    test.do("UserService.authenticate").with(validUser).noError();
    test.do("UserService.authenticate").with({password:"BOB"},validUser).hasError(/Permission denied/);
});
defineTestCase documentation
Testing from the command line
We can unit test our API using the hopjs utility, which will run all the unit tests from the command line:
npm install hopjs-remote -g
hopjs --url http://localhost:3000/ --unitTest
We can also run the test in the browser of our choosing
hopjs-browser-test --url http://localhost:3000/ --browser firefox
Generating native Android APIs
(This is still a work in progress)
Now let's suppose we wanted an Android set of native client stubs for our API in Java:
hopjs-gen --url http://www.website.com:3000/ android --outputDir ./androidApp --package com.website.www --apiVersion 1.0
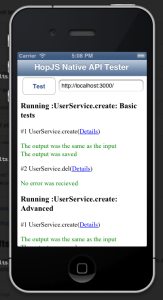
Generating native iOS APIs
Now let's assume we wanted a native version of the APIs for iOS, and you have OSX and XCode installed:
hopjs-gen --url http://localhost:3000/ apple --type iostest --outputDir IOSTest --projectName IOSTest
cd IOSTest
make
open IOSTest.xcworkspace
# On the top left of xcode select "IOSTest > iPhone X Simulator" and click the 'Run' button
# If this fails in the project view select *.storyboard and delete the references from the project and re-add them.
# After that it should just work!
You can read more about Objective-C APIs here: https://github.com/celer/hopjs/tree/master/gen/apple
Running the example
You can see a complete working example at: https://github.com/celer/hopjs/tree/master/examples/intro
Intelligent server-side caching of results
Now lets assume that we've written a killer server-side API, but we haven't done any caching of our results so each
time we need to do something we're hitting our database. HopJS has the ability to add caching on top of your API quickly
and easily.
Hop.enableCaching({ log:true, redisClient: myRedisClient });
Hop.defineClass("UserService",UserService,function(api){
api.usage("Manages users");
api.get("load","/user/:id").demand("id").cacheId("/user/:id",60,true);
api.del("delete","/user/:id").demand("id").cacheInvalidate("/user/:id");
api.get("list","/user/").optional("sortBy").cacheId("/users/:start/:size/",5000).demand("start").demand("size");
});
Caching works by associating a unique ID with each result returned from an API call - the trick is that the ID is calculated based upon the object that is used as an input or returned as a result of calling the API call.
Time for a quick example:
UserService.load({id:5})
UserService.del({id:5})
You can see a complete working example at: https://github.com/celer/hopjs/tree/master/examples/caching
API Interfaces
HopJS also has the ability to define an API interface which can be used to quickly stub out APIs which share their interfaces:
Hop.defineInterface("Notification",function(api){
api.post("send","#classname/send").usage("Sends a message").demand("msg").demand("subject").demand("to");
});
Hop.defineClass("Email",EmailService,function(api){
api.extend("Notification");
});
You can see a complete working example at: https://github.com/celer/hopjs/tree/master/examples/interface
Working with files
Working with files is pretty simple! To send files we can simply tell HopJS how to send the file, either as a raw file, or as an attachmet. We can
also allow uploads using the .demandFile or the .optionalFile
	FileTest.sendFile=function(input,onComplete){
		return onComplete(null,Hop.sendFile("public/pig.png"));
	}

	FileTest.sendAttachment=function(input,onComplete){
		return onComplete(null,Hop.sendAttachment("public/pig.png","image.png"));
	}

	FileTest.upload=function(input,onComplete){
		return onComplete(null,input);
	}


	Hop.defineClass("FileTest",FileTest,function(api){
		api.get("sendFile","/file")
		api.get("sendAttachment","/attachment");
		api.post("upload","/upload").demandFile("required").optionalFile("optional");
	});
You can see a complete working example at: https://github.com/celer/hopjs/tree/master/examples/files
Models
Models can be defined which will enable both validation of inputs but re-use of documenation and type conversion.
	Hop.defineModel("User",function(user){
		user.field("id","UserID","The user's id").integer().ID();
		user.field("name","Username","The user's username").string().regexp(/[A-Za-z0-9\_\-]{3,10}/,"Usernames must be between 3 and 10 characters long, and can only contain alphanumeric characters");
		user.field("email","Email","The user's email address").string();
		user.field("password","Password","The user's password").password();
	});
Now we can simply indicate a model is used for a call by using .useModel, .inputModel or .outputModel
	Hop.defineClass("UserService",UserService,function(api){
		api.usage("Manages users");
		api.post("create","/user").usage("Creates a user").demands("email","name","password").useModel("User");
		api.post("authenticate","/user/auth").usage("Authenticates a user").demands("password","name").useModel("User");
		api.get("currentUser","/user").usage("Returns the current user").outputModel("User");
		api.get("logout","/user/logout").usage("Logs the current user out");
		api.del("del","/user/:id").usage("Deletes the user").demand("id").inputModel("User");
	});
You can see a complete working example at: https://github.com/celer/hopjs/tree/master/examples/model
Notes about REST
- Our implementation of REST is designed to be used with forms and does not support null values or special types, all values are converted to strings (null=="")
- Per specification HTTP delete does not allow passing of parameters beyond what are specified in the path
Known Issues / Todo
- iPhone API generation works but needs further testing
- Android API generation works, testing and validation on it does not
- A bug in combination-stream, which is utilized by request and form-data prevents the unit tests for expirements/test from passing, see my fork of combination-stream for a fix
- Curl can't save session cookies so some shell tests won't wor
- Need to add SSL support
- Need to add dev key support


