Security News
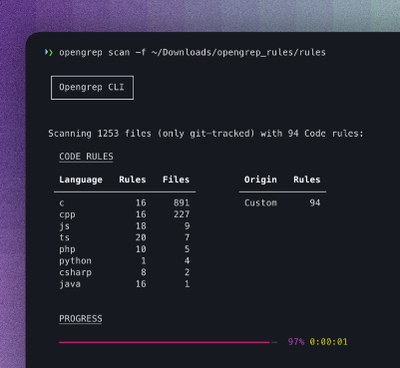
Opengrep Emerges as Open Source Alternative Amid Semgrep Licensing Controversy
Opengrep forks Semgrep to preserve open source SAST in response to controversial licensing changes.
Monkberry compile template to JavaScript code for creating nodes with DOM API and helper methods for updating content of these nodes.
npm install monkberry --save
Monkberry will compile this template:
<div>
  <h1>{{ title }}</h1>
  <p>
    {{ text }}
  </p>
</div>
To JavaScript code like this:
var div = document.createElement('div');
var h1 = document.createElement('h1');
var p = document.createElement('p');

div.appendChild(h1);
div.appendChild(p);

   ...

view.update = function (data) {
  h1.textContent = data.title;
  p.textContent = data.text;
};
Which can be used like that:
var view = Monkberry.render(template, document.body);

view.update({
  title: 'Monkberry',
  text: 'JavaScript DOM template engine'
});
Monkberry has support for both browserify via monkberrify and for webpack via monkberry-loader.
Monkberry can be used like CLI tool. Install Monkberry globally:
npm install monkberry -g
To compile all templates into single JavaScript file with source map run next command:
monkberry --source-map --output template.js templates/*.html
Require generated template.js and monkberry.js files and render that view.
var Monkberry = require('monkberry');
var Template = require('./template.js');

var view = Monkberry.render(Template, document.body);
Now, to update data of view on page:
view.update({...});
// or update only what's needed
view.update({key: value});
Monkberry perceives everything inside {{ and }} mustache as JavaScript expression.
<div class="greetings {{ visible ? '' : 'hidden' }}">
  Hello, {{ user.name + "!" }}
</div>
Can be any valid JavaScrpt expressions.
{% if count < 0 || count > 10 %}
  ...
{% else %}
  ...
{% endif %}
Any number on variables in if:
{% if array.indexOf(search) != -1 %}
  ...
{% endif %}
Note what Monkberry update only one of
if/elseblock.{% if check %} Then {{ value }}! {% else %} Else {{ value }}! {% endif %}Render that template:
var view = Monkberry.render(Example, document.body);
view.update({
  check: true,
  value: 'one'
});
View will be
Then one!. When if update view:view.update({ check: false, value: 'two' });View will be
Else two!. But if update onlycheck, variable of then part will be same as before.view.update({check: true});View will be
Then one!.This is happens because Monkberry does not stores variables passed to
updatefunction, it stores only DOM nodes. Monkberry will update only one part ofif/else.
Monkberry can loop other arrays and objects as well.
{% for array %}
  {{ name }}
{% endfor %}
In this form, body of for has access only for variables iterating on.
view.update({
  array: [
    {name: 'Anton'},
    ...
  ]
});
To access outer scope specify iterator name.
{% for user of array %}
  {{ user.name }}
{% endfor %}
Also key can be specified.
{% for key, user of array %}
  {{ key }}: {{ user.name }}
{% endfor %}
<div class="foo {{ modify || 'baz' }}">
    {{ content || "No content" }}
</div>
View rendered without data will be filled with default data:
<div class="foo baz">
    No content
</div>
Note if you will use some variable in right side of OR operator, what can't be used as default data.
{{ content || "No content" + foo }}
Any expression support filter statement.
Hello, {{ user.name | upper }}
To define that filter:
Template.filters.upper = function (text) {
  return text.toUpperCase();
};
Also Monkberry understand parameters for filters:
template.filters.replace = function (text, from, to) {
  return text.replace(from, to);
};
{{ text | replace(/.../, '$1') }}
And allow to combine filters:
{{ text | lower | replace(/.../, '$1') | upper }}
That expression will be compiled to next JavaScript:
upper(replace(lower(text), /.../, '$1'));
Filters can be used in expressions, if and for statements.
Custom tag template greet.monk:
<div>
  {{ value }}, {{ name }}!
</div>
To render that custom tag in another template:
{% import greet from './greet.monk' %}
<greet value="Hello" name="world">
<greet value="Hello" name="{{ user.name }}">
Spread attributes allow easily convert object into node attributes.
The properties of the object that you pass in are copied onto the node's attributes.
<input {{...attr}}/>
view.update({attr: {
  id: 'foo',
  value: 'baz'
}});
You can combine it with other attributes.
<input {{...attr}} value={{ value }}/>
Note what later updates of attributes override previous ones.
view.update({value: 'baz'});
// ...
view.update({attr: {value: 'new baz'}}); // Will override previous value.
Spread operator also works well with custom attributes. In fact, this is best way to pass data into custom tag.
<my-tag {{...attr}}/>
<my-tag>
    <input type={{ type }} value={{ value }}>
</my-tag>
It is possible to require template within another template.
{% import Component './Component.monk' %}

    <Component/>
Also it's possible to include any JS file or module:
{% import upperCase 'upper-case' %}
// ...
{{ upperCase(name) }}
There are a few ways to deal with event handling in Monkberry. Add event listener to node directly:
view.querySelector('.button').addEventListener('click', function (event) {
    ...
});
But this is difficult when dealing with conditions and loops.
Better approach is to use event delegating.
view.on('click', '.button', function (event) {
    ...
});
Monkberry also support global variables. This is very usefull if using window variable inside of templates.
Or if using translation function like this: {{ __('greeting') + userName }}.
To do it, you need to specify globals as array of variables names for compiler to pass. Read monkberry loaders docs for more info.
To speedup render Monkberry can prerender DOM nodes to use them in future.
Monkberry.prerender(Template, 10); // Preprender template 10 times.
Then next render call will use one of these prerendered views:
Monkberry.render(Template, node); // Will use already created DOM nodes.
This is very usefull to do then browser waiting some xhr request.
Transformers allow to modify AST before compilation of templates. List of AST nodes can be founded here: ast.js Example of transform which trim whitespaces: whitespace.js
Add transforms to Monkbeery before compilation:
import { Compiler } from 'monkberry';
import { myTransform } from './myTransform';

var compiler = new Compiler();
compiler.transforms.custom = myTransform;
Monkberry escape all inserted variables by default. But if some times you want to insert
some HTML template via variable you can you unsafe statement which is using innerHTML.
Improper use of the unsafe statement can open you up to a cross-site scripting (XSS) attack.
{% unsafe '<a href="XSS">...</a>' %}
{% unsafe html %}
You can use standard html comments.
<!-- Comment does here -->
Comments will be cut out from template.
Monkberry API strictly follows semantic versioning.
Render template, and returns new Monkberry instance.
Generates views for future calls of render method.
Append rendered view nodes to specified node.
toNode: Element - DOM node.Insert rendered view nodes before specified node.
toNode: Element - DOM node.Return view's nodes. Note what if your template contains more then one root element, createDocument function will
return DocumentFragment what contains all these nodes. If you have only one root node, it will be returned as is.
Update rendered template with new data. You can specify only part of data to update or update entire data.
data: Object|Array - values to update in template.Example:
var data = {
    title: 'Title #1',
    content: '...'
};

view.update({title: 'Title #2'});
Remove view's nodes from document, and puts it to pool for future reuse.
Select node by query.
query: string - query to select node.Note what this function uses Element.matches() for checking root nodes. Include polyfill for matches if you use it.
If you template contains more then one nodes on first level, querySelector will look other all subtrees. Array of all top level nodes can be accessed by view.nodes[] array.
Note what querySelector can not work with template which have if/for/custom node on first level.
{% if cond %}
    ...
{% endif %}
You will got exception like this:
Can not use querySelector with non-element nodes on first level.Solution is to wrap such statement into another node:
<div>
    {% if cond %}
        ...
    {% endif %}
</div>
Monkberry uses Jasmine and testem. To run test locally run:
testem ci
Benchmarks covers a few use cases, and compare Monkberry with React and innerHTML. Also it's contains real site code for tests.
FAQs
Monkberry is a JavaScript library for building web user interfaces
The npm package monkberry receives a total of 598 weekly downloads. As such, monkberry popularity was classified as not popular.
We found that monkberry demonstrated a not healthy version release cadence and project activity because the last version was released a year ago. It has 1 open source maintainer collaborating on the project.
Did you know?

Socket for GitHub automatically highlights issues in each pull request and monitors the health of all your open source dependencies. Discover the contents of your packages and block harmful activity before you install or update your dependencies.

Security News
Opengrep forks Semgrep to preserve open source SAST in response to controversial licensing changes.

Security News
Critics call the Node.js EOL CVE a misuse of the system, sparking debate over CVE standards and the growing noise in vulnerability databases.

Security News
cURL and Go security teams are publicly rejecting CVSS as flawed for assessing vulnerabilities and are calling for more accurate, context-aware approaches.