authing-js-sdk
JavaScript SDK 支持 Angular.js, React.js, Vue.js 以及 Node.js.我们提供了完全一致的接口.
点击体验

安装
NPM
当构建大规模应用时,我们推荐使用 npm 进行安装, 它可以与一些模块打包工具很好地配合使用,如 Webpack, Browserify。
# latest stable
$ npm install authing-js-sdk --save
开始使用
使用方法
ES5
在ES5中我们使用 Promise 处理异步编程。
var Authing = require('authing-js-sdk');
var auth = new Authing({
clientId: 'your_client_id',
secret: 'your_app_secret'
});
auth.then(function(validAuth) {
validAuth.login({
email: 'test@testmail.com',
password: 'testpassword'
}).then(function(user) {
console.log(user);
}).catch(function(error) {
console.log(error);
});
}).catch(function(error) {
console.log(error);
});
怎样获取 Client ID ?。
ES6+
在ES6+中,我们使用 async 函数 和 await 关键字 处理异步编程。
import Authing from 'authing-js-sdk';
const main = async () => {
let auth;
try{
auth = await new Authing({
clientId: 'your_client_id',
secret: 'your_app_secret'
});
}catch(error) {
console.log('Authing 验证失败:', error);
}
if(auth) {
let user;
try {
user = await auth.login({
email: 'test@testmail.com',
password: 'testpassword'
});
}catch(error) {
console.log('登录失败:', error);
}
if(user) {
console.log('login success');
}else {
console.log('login failed');
}
}
}
main();
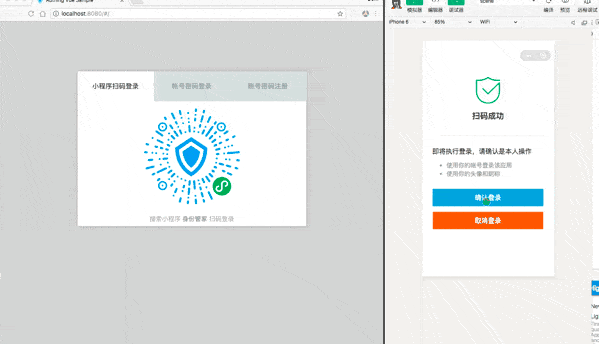
小程序扫码登录
小程序扫码登录指使用 Authing 小程序 身份管家 执行微信登录。
示例:小程序扫码登录
基础用法
使用 startWXAppScaning 方法:
var Authing = require('authing-js-sdk');
var auth = new Authing({
clientId: 'your_client_id',
secret: 'your_app_secret'
});
auth.then(function(validAuth) {
validAuth.startWXAppScaning({
mount: 'qrcode-node',
});
})
扫码完成后会自动跳到用户配置的URL上。
参数说明
validAuth.startWXAppScaning({
mount: 'qrcode-node',
redirect: true,
onSuccess: function(res) {},
onError: function(error) {},
onIntervalStarting: function(intervalNum) {},
interval: 1500,
tips: '搜索小程序 <strong>身份管家</strong> 扫码登录',
});
了解更多,请查看:使用小程序扫码登录
自定义请求链接
Authing 构造函数包含一个名为 host 对象,可接收自定义的请求链接(适合私有部署 Authing 的用户使用),使用方法如下:
const authing = new Authing({
	clientId: 'xxxx',
	secret: 'xxxxxx',
	host: {
		user: 'https://users.authing.cn/graphql',
		oauth: 'https://oauth.authing.cn/graphql'
	}
});
host 对象中 user 和 oauth 的默认值是 Authing 官方的请求链接:
Node.js其他生态中间件
- express-middleware
当在浏览器使用时,我们会将用户 token 以 '_authing_token' 字段存在 localStorage 中,后面都会从 localStorage 中读取并进行验证。
了解更多报错的详情,请查看错误代码。
获取Client ID和Client Secret,请点击这里。


