Leaflet.DistortableImage


A Leaflet extension to distort images -- "rubbersheeting" -- for the MapKnitter.org (src) image georectification service by Public Lab. Leaflet.DistortableImage allows for perspectival distortions of images, client-side, using CSS3 transformations in the DOM.
Advantages include:
- It can handle over 100 images smoothly, even on a smartphone
- Images can be right-clicked and downloaded individually in their original state
- CSS3 transforms are GPU-accelerated in most (all?) browsers, for a very smooth UI
- No need to server-side generate raster GeoTiffs, tilesets, etc. in order to view distorted imagery layers
- Images use DOM event handling for real-time distortion
- Full resolution download option for large images, using WebGL acceleration
Download as zip or clone the repo to get a local copy.
Also available on NPM as leaflet-distortableimage.
Setup
- From the root directory, run
npm install or sudo npm install
Demo
Check out this simple demo.
And watch this GIF demo:
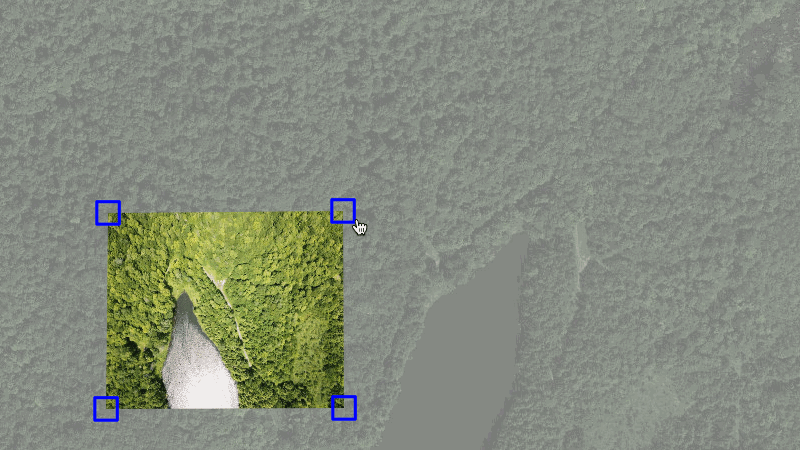
To test the code, open index.html in your browser and click and drag the markers on the edges of the image. The image will show perspectival distortions.
For the additional features in the multiple image interface, open select.html and use shift + click on an image or shift + drag on the map to "multi-select" images. For touch screens, touch + hold the image.
Single Image Interface
The simplest implementation is to create a map, add our recommended TileLayer to it, then create an image instance of L.distortableImageOverlay and add it onto the map.
map = L.map('map').setView([51.505, -0.09], 13);
map.addGoogleMutant();
map.whenReady(function () {
img = L.distortableImageOverlay('example.png').addTo(map);
});
Note: If you have a different idea in mind, skip the map.addGoogleMutant() call and add your preferred TileLayer instead.
For example, for a more standard looking map you can use:
L.tileLayer('https://{s}.tiles.mapbox.com/v3/anishshah101.ipm9j6em/{z}/{x}/{y}.png', {
maxZoom: 18,
attribution: 'Map data © <a href="http://openstreetmap.org">OpenStreetMap</a> contributors, ' +
'<a href="http://creativecommons.org/licenses/by-sa/2.0/">CC-BY-SA</a>, ' +
'Imagery © <a href="http://mapbox.com">Mapbox</a>',
id: 'examples.map-i86knfo3'
}).addTo(map);
Options available to pass during L.DistortableImageOverlay initialization:
Actions
actions (optional, default: [ToggleTransparency, ToggleOutline, ToggleLock, ToggleRotateScale, ToggleOrder, Revert, Export, Delete], value: array)
If you would like to overrwrite the default toolbar actions available for an individual image's L.Popup toolbar, pass an array with the actions you want. Reference the available values here.
For example, to overrwrite the toolbar to only include the ToggleTransparency and Delete actions, and also add on the additional ToggleScale action:
img = L.distortableImageOverlay('example.png', {
  actions: [ToggleTransparency, ToggleScale, Delete]
}).addTo(map);
Corners
corners (optional, default: an array of LatLangs that position the image on the center of the map, value: array)
Allows you to set an image's position on the map manually (somewhere other than center).
They should be passed as an array of L.latLng objects in NW, NE, SW, SE order (in a "Z" shape).
This will not have an effect on the map view, but it will determine the shape and dimensions of the rendered image.
They will be stored on the image. See the Quick API Reference for their getter and setter methods.
Example:
img = L.distortableImageOverlay('example.png', {
corners: [
L.latLng(51.52,-0.14),
L.latLng(51.52,-0.10),
L.latLng(51.50,-0.14),
L.latLng(51.50,-0.10)
]
}).addTo(map);
JSON.stringify(img.getCorners())
=> "[{"lat":51.52,"lng":-0.14},{"lat":51.52,"lng":-0.1},{"lat":51.5,"lng":-0.14},{"lat":51.5,"lng":-0.1}]"
JSON.stringify(img.getCorners())
=> "[{"lat":51.50685099607552,"lng":-0.06058305501937867},{"lat":51.50685099607552,"lng":-0.02058595418930054},{"lat":51.486652692081925,"lng":-0.06058305501937867},{"lat":51.486652692081925,"lng":-0.02058595418930054}]"
Editable
editable (optional, default: true, value: boolean)
Internally, we use the image load event to trigger a call to img.editing.enable(), which sets up the editing interface (makes the image interactive, adds markers and toolbar).
For a scenario where you want to allow editing based on custom logic, you can pass editable: false and then write your own function with a call to img.editing.enable(). Other passed options such as selected: true and mode will still be applicable and applied then.
Note: when using the multiple image interface (L.DistortableCollection) this option will be ignored on individual L.DistortableImageOverlayinstances and should instead be passed to the collection instance.
Selected
selected (optional, default: false, value: boolean)
By default, your image will initially appear on the screen as "unselected", meaning its toolbar and editing handles will not be visible. Interacting with the image, such as by clicking it, will make these components visible.
Some developers prefer that an image initially appears as "selected" instead of "unselected". In this case, we provide an option to pass selected: true.
Note: when working with the multi image interface, only the last overlay you pass selected: true to will appear with editing handles and a toolbar.
Mode
mode (optional, default: "distort", value: string)
Each primary editing mode corresponds to a separate editing handle.
This option sets the image's initial editing mode, meaning the corresponding editing handle will always appear first when you interact with the image.
Values available to pass to mode are:
- distort (default): Distortion via individually draggable corners.
- rotate: Rotation only.
- scale: Resize only.
- rotateScale: Free transform. Combines the rotate and scale modes into one.
- lock: Prevents any image actions (including those triggered from the toolbar, user gestures, and hotkeys) until the toolbar action ToggleLock is explicitly triggered (or its hotkey l).
In the below example, the image will be initialiazed with "rotateScale" handles:
img = L.distortableImageOverlay("example.png", {
  mode: "rotateScale",
}).addTo(map);
Full-resolution download
fullResolutionSrc (optional)
We've added a GPU-accelerated means to generate a full resolution version of the distorted image; it requires two additional dependencies to enable; see how we've included them in the demo:
<script src="../node_modules/webgl-distort/dist/webgl-distort.js"></script>
<script src="../node_modules/glfx/glfx.js"></script>
When instantiating a Distortable Image, pass in a fullResolutionSrc option set to the url of the higher resolution image. This image will be used in full-res exporting.
img = L.distortableImageOverlay('example.png', {
  fullResolutionSrc: 'large.jpg'
}).addTo(map);
Suppress Toolbar
suppressToolbar (optional, default: false, value: boolean)
To initialize an image without its toolbar, pass it suppressToolbar: true.
Typically, editing actions are triggered through our toolbar interface or our predefined keybindings. If disabling the toolbar, the developer will need to implement their own toolbar UI or just use the keybindings. (WIP API for doing this)
This option will override other options related to the toolbar, such as selected: true
Multiple Image Interface
Our DistortableCollection class allows working with multiple images simultaneously. This interface builds on the single image interface.
The setup is relatively similar - here is an example with two images:
img = L.distortableImageOverlay('example.png', {
corners: [
L.latLng(51.52, -0.14),
L.latLng(51.52,-0.10),
L.latLng(51.50, -0.14),
L.latLng(51.50,-0.10)
],
});
img2 = L.distortableImageOverlay('example.png', {
corners: [
L.latLng(51.51, -0.20),
L.latLng(51.51,-0.16),
L.latLng(51.49, -0.21),
L.latLng(51.49,-0.17)
],
});
imgGroup = L.distortableCollection().addTo(map);
imgGroup.addLayer(img);
imgGroup.addLayer(img2);
Note: our DistortableCollection class uses event listeners internally (layeradd) to enable additional editing features on every image as it's added. This event is only triggered if we add the layers to the group dynamically. I.e. you must add the group to the map initially empty.
Although not required, you will probably want to pass corners to individual images when adding multiple or they will be positioned on top of eachother.
Options available to pass during L.DistortableCollection initialization:
✤ Actions
actions (optional, default: [Exports, Deletes, Locks, Unlocks], value: array)
Overrwrite the default toolbar actions for an image collection's L.Control toolbar. Reference the available values here.
For example, to overrwrite the toolbar to only include the Deletes action:
imgGroup = L.distortableCollection({
  actions: [Deletes]
}).addTo(map);
To add / remove a tool from the toolbar at runtime, we have also added the methods addTool(action) and removeTool(action).
✤ Editable
editable (optional, default: true, value: boolean)
See editable.
UI and functionalities
Currently it supports multiple image selection and translations, and WIP we are working on porting all editing tools to work for it, such as transparency, etc. Image distortions still use the single-image interface.
multi-select: A single toolbar instance (using L.control) renders the set of tools available to use on collections of images.
- Multi-selection works with shift +
click to toggle an individual image's inclusion in this interface. - Or shift +
drag to use our BoxSelector handler to select multiple at once. - Or for touch devices,
touch + hold (aka longpress).
un-multi-select:
- In order to return to the single-image interface, where each
L.popup toolbar only applies actions on the image it's attached to, you must toggle all images out of multi-select or... - ...Click on the map or hit the esc key to quickly deselect all images.
- For the aforementioned 3 mutli-select methods, the
BoxSelector method is the only one that doesn't also toggle out of multi-select mode.
Toolbar Actions (& Keybindings)
Single Image Interface
Defaults:
- ToggleLock (l)
- Toggles between
lock mode and distort mode.
- ToggleRotateScale (r, d)
- Toggles between
rotateScale and distort mode.
- ToggleOrder (j, k)
- If you have multiple images, use this to switch an individual image's overlap back and forth into view. Employs
bringToFront() and bringToBack() from the Leaflet API.
- ToggleOutline (o)
- ToggleTransparency (t)
- Revert
- Restores the image to its original proportions and scale, but keeps its current rotation angle and location on the map intact.
- Export
- Delete (delete, backscpace)
- Permanently deletes the image from the map.
Addons:
- ToggleRotate (caps lock):
- Toggles between
rotate mode and distort mode. - Replaced as a default toolbar action by
ToggleRotateScale, but still accessible via its hotkey, mode, and (WIP) custom toolbar actions API.
- ToggleScale (s):
- Toggles between
scale mode and distort mode. - Replaced as a default toolbar action by
ToggleRotateScale, but still accessible via its hotkey, mode, and (WIP) custom toolbar actions API.
- EnableEXIF (WIP)
Multiple Image Interface
Defaults:
- Exports (WIP)
- Deletes (delete, backspace)
- Permanently deletes groups of selected images from the map. Uses a
confirm() modal dialog.
- Locks (l)
- Unlocks (u)
Quick API Reference
L.Map
We have extended Leaflet's L.Map to include a convenience method for this library:
addGoogleMutant(opts? <Mutant options>): this
- adds a Google Mutant layer with location labels according to our recommended setup.
- label visibility is toggled by double clicking on the map.
- Mutant options: {
- labels: <boolean>, default: true
- If set to
false, the mutant layer will not have location labels
- labelOpacity: <number 0, 1>, default: 0
- If set to
1, labels will be initially visible
- mutantOpacity: <number 0..1>, default: 0.8
- Same as Leaflet's
L.TileLayer opacity option
- maxZoom: <number 0..21>, default: 18
- Same as Leaflet's
L.TileLayer maxZoom option, except has a maximum value of 21 because higher zoom levels on the mutant layer will result in an error being thrown. - The mutant layer will appear blurry for zoom levels exceeding 18.
- minZoom: <number 0..maxZoom>, default: 0
- Same as Leaflet's
L.TileLayer maxZoom option
}
And the following custom handlers:
doubleClickLabels: this
- when location labels are added via
#addGoogleMutant, this handler is enabled by default to allow toggling their visibility by double clicking on the map. - afterwards, can be enabled / disabled during runtime via Leaflet's Handler API.
- overrides the map's default
doubleClickZoom handler when enabled. When disabled, automatically re-enables it.
boxSelector: this
- overrides the map's default
boxZoom handler. - allows multiple images to be selected when shift +
draging on the map in the multiple-image inerface.
We have made slight changes to a default Leaflet handler:
doubleClickZoom: this
- This handler and
doubleClickLabels time and fire a custom singleclick event on map click. It is fired after a 3ms timeout if the click doesn't become a doubleclick. - This allows our images to remain selected during associated double click events on the map (in this case zooming).
- Our image classes listen for
singleclick while either this or the other doubleClick handler is enabled.
L.DistortableImageOverlay
getCorner(idx <number 0..3>): LatLng
- returns the coordinates of the image corner at index.
getCorners(): 4 [LatLng, LatLng, LatLng, LatLng]
- returns the coordinates of the image corners in NW, NE, SW, SE order.
setCorner(idx <number 0..3>, LatLng): this
- updates the coordinates of the image corner at index to LatLng and, where applicable, marker and toolbar positioning.
- we use this internally for
distort mode.
setCorners(corners): this
- same as
#setCorner, but takes in a "corners" object to update all 4 corners with only one UI update at the end. - we use this internally for image translation, rotation, and scaling.
- corners: { keys: <number 0..4>, values: LatLng }
ex.
var scaledCorners = {0: '', 1: '', 2: '', 3: ''},
    i, p;

for (i = 0; i < 4; i++) {
  p = map
    .project(img.getCorner(i))
    .subtract(center)
    .multiplyBy(scale)
    .add(center);
  scaledCorners[i] = map.unproject(p);
}

img.setCorners(scaledCorners);
getCenter(): LatLng
- calculates the centroid of the image.
scaleBy(factor <number>): this
- scales the image by the given factor and calls
#setCorners. - a scale of 0 or 1 will leave the image unchanged - but 0 causes the function to automatically return.
- a negative scale will invert the image and, depending on the factor, change its size.
- ex.
img.scaleBy(0.5)
rotateBy(rad <number>): this
- rotates the image by the given radian angle and calls
#setCorners.
L.DistortableImageOverlay.Edit
A handler that holds the keybindings and toolbar API for an image instance. It is always initialized with an instance of L.DistortableImageOverlay. Besides code organization, it provides the ability to enable and disable image editing using the Leaflet API.
Note: The main difference between the enable / disable runtime API and using the editable option during initialization is in runtime, neither individual image instaces nor the collection group get precedence over the other.
enable(): this
- Sets up the editing interface (makes the image interactive, adds markers and toolbar).
- Called internally by default (editable), but unlike the option it can be used in runtime and is not ignored if there is a collection group. In fact...
- ...An individual image can be enabled while the group is disabled. i.e. calling
img.editing.enable() after imgGroup.editing.disable() is valid. In this case, the single image interface will be available on this image but not the multi-image interface.
disable(): this
- Removes the editing interface (makes the image non-interactive, removes markers and toolbar).
- Called internally by default on image deletion.
- An individual image can be disabled while the group is enabled.
enabled(): Boolean
- Returns true if editing on the individual image instance is enabled.
img.editing.enabled()
L.DistortableCollection
isSelected(img <DistortableImageOverlay>): Boolean
- Returns true if the passed
DistortableImageOverlay instance is multi-selected, i.e. its underlying HTMLImageElement has a class containing "selected".
anySelected(): Boolean
- Returns true if any
DistortableImageOverlay instances are mutli-selected.
L.DistortableCollection.Edit
Same as L.DistortableImage.Edit but for the collection (L.DistortableCollection) instance.
enable(): this
- Sets up the multi-editing interface.
- Called internally by default, see editable.
- Calls each individual image's
#enable method and then enables the multi-image interface.
disable(): this
- Removes the editing interface (makes the image non-interactive, removes markers and toolbar).
- Called internally by default on image group deletion, but can also be used for custom behavior.
- Calls each individual image's
#disable method and disables the multi-image interface.
enabled(): Boolean
- Returns true if editing on the collection instance is enabled.
imgGroup.editing.enabled()
removeTool(action <EditAction>)
- Removes the passed tool from the control toolbar in runtime.
- ex:
imgGroup.removeTool(Deletes)
addTool(action <EditAction>)
- Adds the passed tool to the end of the control toolbar in runtime. Returns false if the tool is not available or is already present.
hasTool(action <EditAction>): Boolean
- Checks if the tool is already present in the currently rendered control toolbar.
Additional Components
Keymapper
L.distortableImage.keymapper(map, {
position: 'topleft'
});
Options:
position (optional, default: 'topright', value: string)
Adds a control onto the map which opens a keymapper legend showing the available key bindings for different editing / interaction options.
(WIP) Currently includes keybindings for all available actions and does not update yet if you use the actions API to limit available actions.
Contributing
This plugin has basic functionality, and is in production as part of MapKnitter, but there are plenty of outstanding issues to resolve. Please consider helping out!
- This project uses
grunt to do a lot of things, including concatenate source files from /src/ to /DistortableImageOverlay.js:
$ npm install -g grunt-cli
$ grunt
- To build all files from
/src/ into the /dist/ folder, run:
$ grunt concat:dist
- Optional: We use SVG for our icon system. Please visit our wiki SVG Icon System if you are interested in making updates to them or just simply learning about our workflow.
Contributors
Many more at https://github.com/publiclab/Leaflet.DistortableImage/graphs/contributors


