WebIDE is a code editor/IDE for creating progressive web apps (PWA) and websites.
Web app: https://webide.se/
Try it locally: npx webide.se
Project homepage: https://webtigerteam.com/editor/
More guides/articles are available in the documentation/
folder (or https://webide.se/about/about.htm)
Quick start
Assuming you already have node.js installed. Open cmd or terminal:
npm install --global webide.se
Then type webide [path to file] to edit any file.
Starting server/client manually on localhost
cd node_modules/webide.se
npm run server
Then open the URL in your browser: http://127.0.0.1:8099/
or run ./start.js to start the client in a webview (recommended)
If you are on a remote server:
node server/server.js --ip=192.168.122.50 --username=admin --password=admin
Replace username and password, and the IP with your public IP-address.
(If you want to allow many users to signup/login you need to setup the editor as a cloud IDE.)
Access behind NAT/firewall
If your computer/device is behind a firewall or NAT, start the server with the following flag(s):
node server/server.js -nat-type client -nat-code XXXXXXX
Your server/editor can then be accessed from https://webide.se/?nat_code=XXXXXXX
Installing as a Desktop editor (single user)
Download from here: (use latest version!)
https://www.webtigerteam.com/editor/download/
See instructions for your operating system below:
Linux:
-
Open a terminal ...
-
Install nodejs from nodesource:
curl -sL https://deb.nodesource.com/setup_10.x | sudo -E bash -
sudo apt-get update
sudo apt-get install -y nodejs
-
Navigate to the folder where you put webide: cd webide
-
Install "node_modules" packages: npm install
-
Make linux_launcher.desktop and linux_start.sh executable:
Via terminal: chmod +x linux_launcher.desktop linux_start.sh
Via GUI: Right click, Properties, Permissions tab, Allow executing file as program. Then double click on the icon.
-
Add desktop shortcut (Unity/GNOME):
Unity: Double click on linux_launcher.desktop to start the editor.
Then right click on the WebIDE icon on the Launcher (left side menu), and select "Lock to Launcher"
Gnome: Run ./linux_create_desktop_shortcut.sh
Or manually run the editor via ./linux_start.sh
Windows
(If you downloaded the .zip package: Right-click on the zip-file, and click "Properties".
At the bottom, next to "Security: This file came from another computer" click "Unblock" and then "Apply"
otherwise you will get a "this file comes from another computer" warning every time you run the editor)
-
Download and install nodejs from https://nodejs.org/
(It should come with a packet manager called npm.)
-
Open a command prompt (Click on start menu => run, then type "cmd.exe")
-
Navigate to the folder this file is located in via the command prompt: cd path\to\webide
-
Install the dependencies by typing npm install and hit enter in the command prompt.
4.5. If the npm install fails you probably need to install build dependencies for Windows!
Easiest method is to open a command prompt (Click on start menu => run, then type "cmd.exe")
but right click on "cmd.exe" and select "Run as administrator".
Then type: npm install --global --production windows-build-tools
(try again if it hangs)
After nodejs and all dependencies are installed, double click (run) start.bat
Add a desktop shortcut:
Double click (run) windows_create_desktop_shortcut.vbs
Mac OS X
-
Download and install nodejs from https://nodejs.org/
(It should come with a packet manager called npm.)
-
Open a terminal: cmd + Space, and type terminal
-
Navigate to the folder this file is located in via the terminal: cd path/to/webide
-
Install the dependencies by typing npm install and hit enter in the terminal.
-
After nodejs and all dependencies are installed, type this in the terminal:
node server/server.js --port=8099 --user=admin --pw=admin
-
Navigate to the following address in your favorite web browser: http://127.0.0.1:8099/
Chromebook
Go to the chrome web store and search for node.js.
Then scroll down to apps. And click "More apps".
Then scroll down until you see "WebIDE - hosted by https://webide.se"
That will use the hosted version on webide.se
We tried to make a pure Chrome app, but that turned out to be too much work.
If you root the device you might be able to install nodejs and run npm install -g webide
Android
We recommend installing the editor on a server. A small VPS will do.
Then open the app in a web browser (Chrome) and you will get a "add to desktop" request.
But if you however want to run the editor locally on your phone, you can do this:
-
Download and run the "Termux" app from the Play store.
-
Within the Termux app, type "apt update" (without the quotes) and press Enter
-
Then type "apt install nodejs" and press Enter
-
Type "Y" and press Enter to confirm you want to install nodejs ...
-
Type "npm install webide.se" (without the quotes) and press Enter
-
Type "cd node_modules/webide.se/server" (without the quotes) and press Enter
-
Type "node server.js --user=admin --pw=admin" (without the quotes) and press Enter
-
Start Chrome and go to url: http://127.0.0.1:8099
-
You will probably get a dialog about adding WebIDE to your home screen.
It is recommended that you do so, as it will allow running the editor without browser bars.
(note: Add-to-home-screen might not work on some Android versions)
-
If you added WebIDE to your home screen you can now close Chrome and click on WebIDE on your home screen.
Note that while you can start the client and connect to another server, in order to run the server on your
Android device you have to start Termux and repeat step 6-7 above every time, so you might want to automate it,
for example adding it to your .bashrc so that the server starts every time you start the Termux app.
And/or use Tasker or other app to make the both the server and the client start at the same time, in one click.
Run the editor on a computer/server that is behind a firewall NAT/router or without a public IP
When starting the server from command line/prompt, specify a code/name in -nat-code argument/flag. Example:
node server/server.js -nat-code mysecret --username=myuser --password=123
Then you can access your computer/server via https://webide.se/?nat_code=mysecret
Able to type "webide" to start the editor via "unix" terminal without installing globally (npm --global)
In a unix like environment it's possible to open files and even pipe to bin/webide,
in order to send streams of text to the editor,
just add the bin folder to your PATH environment variable:
export PATH="$PATH:/path/to/node_modules/webide.se/bin"
Put it in ~/.bashrc to make the PATH update permanent.
Able to type webide in Windows command prompt without installing globally (npm --global)
Add the webide/bin folder to the Path environment variable:
(Windows 10) Start > Settings > System > About > System info > Advanced system settings > Environment variables ...
Select: Path, then click Edit, then New, and write:
C:\path\to\where\you\installed\node_modules\webide.se\bin\
(tip: Use the file explorer to navigate to the webide\bin folder, then copy the path/address)
Click OK > OK > OK
You have to open a new Command Prompt for the change to take effect.
Permission issues when installing via npm using --global flag
When installing globally npm wants to put packages in places that might require root/administrator privileges.
To fix this on a unix-like system such as Linux you can create a special folder for npm to put global files in:
mkdir ~/.npm-packages

cat <<EOT >> .bashrc
# Install global NPM packages in home dir
NPM_PACKAGES="~/.npm-packages"
export PATH="$NPM_PACKAGES/bin:$PATH"
EOT

npm config set prefix=$HOME/.npm-packages
npm install --global webide.se
Permission issues running npx on Windows 10/11 (EPERM: operation not permitted, mkdir)
Likely your home directory "C:\users\your name" contains a space...
Start->Run type cmd, press Enter
cd C:\Users\
dir /x
This will show you the short path to your home directory, for example "John Doe" might be JOHNDO~1
Then edit your npm configuration:
npm config set cache "C:\Users\JOHNDO~1\AppData\Roaming\npm-cache" --global
Missing npm build dependencies
All native module dependences are optional, but they are nice to have!
Typical sign of missing build dependencies is that you get a bunch of errors when installing via npm.
Installing the following packages should satisfy the build scripts:
node-gyp python2 make gcc g++
On Windows the following npm package will install the build dependencies:
npm install --global --production windows-build-tools
NPM Error: Failed to replace env in config: ${APPDATA} on Windows
Edit file as Administrator: C:\Program Files\nodejs\node_modules\npm\npmrc
Replace "prefix=${APPDATA}\npm" with "prefix=C:\Program Files\nodejs\node_modules\npm"
Using Git repositories with Mercurial on Windows
You need to install "hggit" which is a Python module for Mercurial.
It is however very tricky to get it to work ...
If you are brave:
- Install Python, Mercurial and TortoiseHg if it's not already installed
- Install hggit: (see https://hg-git.github.io/)
- Generate SSH key and edit mercurial.ini
Running the editor in Google Cloud Shell
-
Try this link: https://console.cloud.google.com/cloudshell/editor?shellonly=true
Or go to https://console.cloud.google.com/
Login with your Google account.
-
If the shell terminal didn't open by itself, click on the icon in the top right
that looks like >_ and says "Activate Google Cloud Shell"
It will bring up a virtual pseudo-terminal at the bottom.
-
Type the following command in the virtual terminal:
npx webide.se --username=admin --password=admin -nat-type client
It will take some time to compile all dependencies, at the end of the output you will see a message:
This backend/server can be reached from public url: http://webide.se/?nat_code=XXXXXXXXX
Go to that URL and fill in the username and password specified in the npx command.
Running the editor in AWS CloudShell
-
Go to https://console.aws.amazon.com/cloudshell/home
And login with your AWS account.
-
After a while you will see a virtual terminal...
Follow step 3 (from Google Cloud Shell) above.
How to update
If you installed using npm:
npm update -g webide.se
If you are using a hosted web app (PWA):
Most likely the editor will tell you there is a new version and ask if you want to upgrade,
but if that for some reason doesn't work - do the following:
- Go to Editor in the WebIDE top menu, and click "Unregister Service Worker". Then reload the page.
If that didn't work, hit Ctrl+Shift+I in to start your browser's developer tools,
then find the Application tab, click on service worker, then force the service worker to (un)register/update.
Reporting bugs
Users in general do not report bugs,
so if you discover a bug, it has likely not been reported already,
even if it's a very common bug!
So it is very appreciated if you do send a bug report!
There are a lot of "bug traps" in the editor source code,
and if something goes wrong the editor will "crash", and open a "bugreport" file.
You can however send any file as a bug report by having "bugreport" in the file name,
then right clicking to bring up the context menu and clicking on "send bug report",
You can also hit Alt + Shift + S on any file
and you will get a dialog asking if you want to send the file as a bug report.
In the bug report file, try to give instructions on how to repeat the bug.
Editing files on remote computers
The editor opens TCP port 8080 (configured via remote-file-port) for receiving remote files.
You can install bin/webider on any remote computer, and then use webider as an editor replacement.
(webider will connect to a WebIDE server and the files will be opened in the local client,
there is no encryption, so only use on LAN for now, eg. not over the Internet)
installing webider on a remote computer (it also need to have nodejs installed!):
wget https://www.webtigerteam.com/editor/download/webider
chmod +x webider
sudo mv webider /usr/local/bin
You might also have to configure the firewall to allow incoming connections to your developer machine.
And also allow the remote computer to connect to your developer machine.
Font settings and styling
The editor only works with mono-space font's (because of the "grid").
Make global changes in settings_overload.js
Each user can make their own customizations using Editor > Customization scripts
For the optimal text experience, try different system/OS font settings on your local machine, like hinting etc.
Example: Turn off anti-alias in Windows: Control Panel > Performance Options Visual Effects. Un-check "Smooth edges of screen fonts"
You can find 'DejaVu Sans Mono' and 'Liberation Mono' in gfx/font, which should look good both with and without anti-alias.
(You might have to install the fonts to your system to make them work in the editor!)
"LCD Text" / sub-pixel-antialas
If you take a screen-shot and zoom in, you will notice the text edges has red, green or blue colors!
This creates an "anti-alias" effect because each pixel on LCD monitors has a red, green and blue line!
"LCD Text" is the default on most operating systems. But some people might see "rainbows".
"LCD Text" is unnecessary on a high-resolution monitor.
Turn off "LCD Text" / sub-pixel-antialas
Set "EDITOR.settings.sub_pixel_antialias = false" in settings_overload.js or webide_js_overload.js
To turn off LCD text for the whole browser (and not just the editor's text area) you need to edit
linux_start.sh or start.js and add --disable-lcd-text to the browser arguments.
Or turn it off in your operating system! (It's already turned off if you have a Mac with "Retina" display)
Re-compiling dependencies for another version of Node.JS
node-gyp rebuild --target=1.2.3
Installing many versions of Node.js
sudo npm install -g n
sudo chmod 700 /usr/lib/node_modules/n/bin/n
sudo n 10
sudo n 12
sudo n 13
sudo n 14
ls -la /usr/local/n/versions/node/
If the editor should be able to automatically switch Node.js version you need to create
~/.local/bin/ and add it to the PATH variable (the cloudIDE automatically does this)
Misc
How to hide the annoying menu in Android that covers the virtual keyboard
Go into settings... Look for browser bar (General settings: Toolbar).. Select to turn it off.
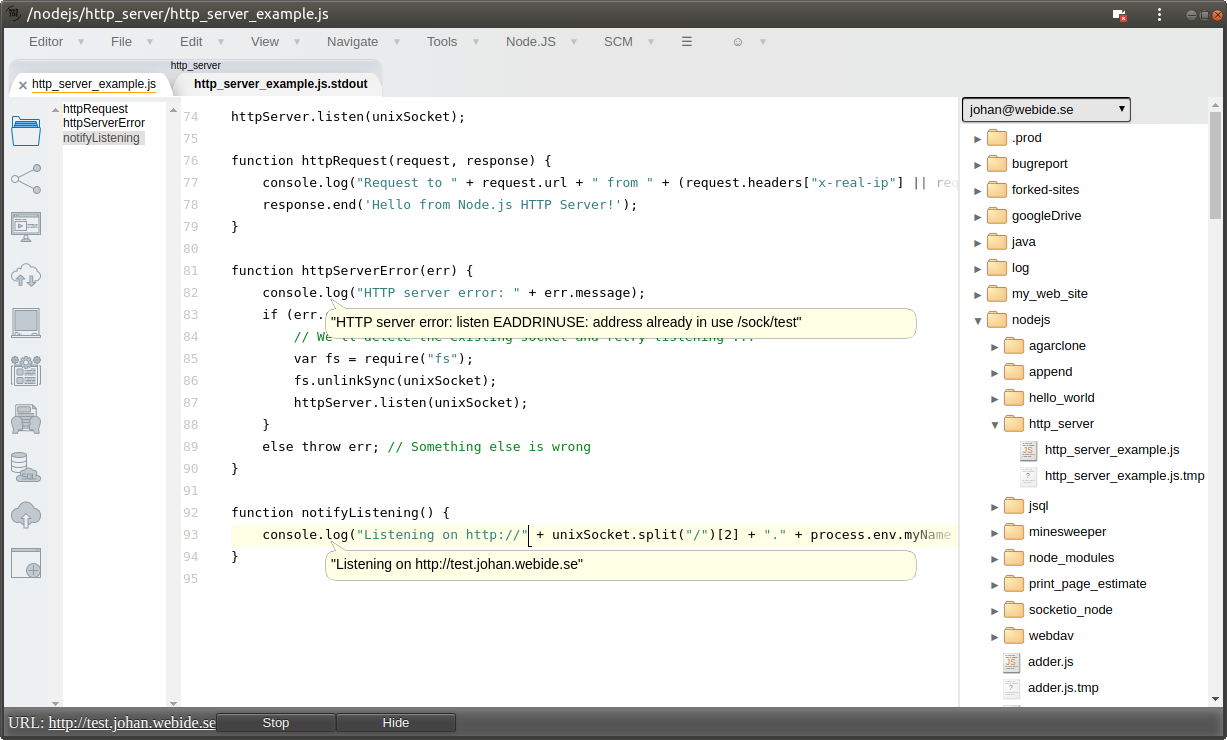
Developing the editor using webide.se
Self hosted development using the editor to edit itself...
Start the backend in the cmd/terminal:
node server/server.js --port=/home/$(whoami)/sock/test --domain=test.$(whoami).webide.se --username=test --password=pleaseuseapassword --home=/home/$(whoami)/
You might have to delete the socket (/home/$(whoami)/sock/test) before re-run. eg. when you get this error: Error: listen EADDRINUSE: address already in use
For running a test environment inside Docker - see indstructions in Dockerfile
Running tests when developing on the editor itself
Setup the test inveroment using cloudide_install.sh or setting it up in a Docker container (see instructions in Dockerfile)
The editor will detect if it's in a "cloud" editor by checking if wwwroot exist, so your working directory needs to be somewhere in wwwroot
( try opening a file inside wwwroot, or open the browser dev console and use EDITOR.changeWorkingDir() )
Running as a cloud editor
You can use the editor "natively" running on your desktop via nw.js or in the browser.
But it's also possible to use the editor as a "cloud" editor, running on a server, and access it via a web browser.
It's recommended to use ZFS (file system) on the server,
so each user can have their own file-system and be able to take snapshots etc.
Running the cloud server on Windows
It is not recommended to run the cloud server on Windows due to lack of Apparmor, and no POSIX commands like chroot and setuid,
meaning that all users will have the same access rights as the user running the server (DO NOT run the server with a Admin account!)
For the cloud server to run on Windows, first install Node.JS build dependencies and Mercurial. And run npm install.
Then you manually have to activate each user by creating a .webide/password in their user directory,
with the hash generated from node hashPw.js
To start the server:
node server/server.js -port 80 -virtualroot -noguest -home C:\Users\
The following text assumes you are on a Unix/Linux like operating system ...
Installing the CloudIDE server OS
It's highly recommended to use ZFS.
The following directories should be zfs filesystems
/home/
/etc/letsencrypt/
Do NOT place /root/ in the home dataset or there will be issues with /root/.ssh/authorized_keys when syncting the datasets
Updating userskeleton and etc/userdir_skeleton
/home/userskeleton ZFS will be cloned for each new user.
Cloned filesystems will not take up HDD space!
-
Update files in etc/userdir_skeleton
or login as userskeleton and download/update stuff
-
Run sudo ./dev-scripts/clean_userskeleton.js which cleans up temporary files and cache,
and also copies fresh files from etc/userdir_skeleton into /home/userskeleton
-
Create a new snapshot, and send it the the prod server
sudo zfs list -t snapshot
sudo zfs snapshot rpool/home/userskeleton@base2
Then send snapshot to prod server...
If the fs do not exist:
sudo zfs send rpool/home/userskeleton@base2 | ssh root@webide.se zfs recv ben/home/userskeleton
If the fs already exist: (send incremental data)
sudo zfs send -i rpool/home/userskeleton@baseX rpool/home/userskeleton@baseY | ssh root@webide.se zfs recv ben/home/userskeleton
(where snap X on the server is the last common snap and snap Y is the latest in dev)
The files might have been modified on the server...
On the server, delete any newer snapshots and/or rollback
zfs list -t snapshot | grep userskeleton
zfs destroy ben/home/userskeleton@backup
zfs rollback ben/home/userskeleton@baseX
Installing/upgrading Nodejs
Uninstall nodejs if it's already installed, then install it from Nodesource.
See https://github.com/nodesource/distributions
sudo apt remove nodejs && sudo apt remove npm
Using Ubuntu:
curl -sL https://deb.nodesource.com/setup_10.x | sudo -E bash -
sudo apt update && sudo apt install -y nodejs
Note: nodesource will use /usr/bin/node, not /usr/bin/nodejs (which is used by Ubuntu) !
Installing certbot (letsencrypt) on Ubuntu 18
sudo apt-get update
sudo apt-get install software-properties-common
sudo add-apt-repository ppa:certbot/certbot
sudo apt-get update
sudo apt-get install python-certbot-nginx
Installing certbot (letsencrypt) on Ubuntu 20
sudo apt install certbot python3-certbot-nginx -y
Automatically set up the server for running WebIDE as a cloud-IDE:
If you have a Linux (Ubuntu) server you can run this install script:
node cloudide_install.js --domain=yourdomain.com
The editor will be installed as a SystemD daemon.
Start the webide server: sudo systemctl start webide
Edit /etc/nginx/sites-available/yourdomain.com.nginx
To check for Nginx config problems:
nginx -T
Installing vnc dependencies
sudo apt update
sudo apt install xvfb x11vnc
Installing/upgrading Dropbox daemon
see: https://www.dropbox.com/install-linux
wget https://www.dropbox.com/download?plat=lnx.x86_64
Extract files to /srv/webide/dropbox/
Do something for each user in bash shell
cd /home/
for d in *; do chown $d:$d /home/$d/.webide; done
Adding and removing webide users
Use the following script to add users to the cloud ide:
./adduser.js username password
To remove a user:
./removeuser username
Error: Command failed: umount "target is busy"
ps -aux | grep node
kill -s 2 810460
sudo -u username kill 810460
sudo systemctl stop nginx
You might have to reboot in order to unmount all directories.
mySQL setup
ref: https://dev.mysql.com/doc/mysql-secure-deployment-guide/5.7/en/secure-deployment-configure-authentication.html
Add these options under the [mysqld] option group in the MySQL configuration file (/etc/my.cnf):
Note: In MariaDB auth_socket is called unix_socket
[mysqld]
plugin-load-add=auth_socket.so
auth_socket=FORCE_PLUS_PERMANENT
You might have to run the following query (logged in as root to the mysql console):
install plugin auth_socket SONAME 'auth_socket.so';
Then run:
service mysql restart
Login to mysql again to make sure auth_socket is activated:
SELECT PLUGIN_NAME, PLUGIN_STATUS FROM INFORMATION_SCHEMA.PLUGINS WHERE PLUGIN_NAME LIKE '%socket%';
Try creating a user:
CREATE USER somelocaluser@localhost IDENTIFIED WITH auth_socket;
DROP USER somelocaluser@localhost;
Make it so root can login without a password:
ALTER USER 'root'@'localhost' IDENTIFIED WITH auth_socket;
PS. You might then only be able to login to mySQL using the system root user and via the unix socket!
sudo -u root mysql --socket /var/run/mysqld/mysqld.sock
Delete iconv-lite in mysql2 Node.JS module
iconv-lite lazy loads some files, which will not work once the editor have chrooted and changed user id,
so we need to use the editors patched version of iconv-lite.
Simply delete node_modules/mysql2/node_modules/iconv-lite
(you might have to do this every time you have run npm, awaiting a better fix)
Linux network namespaces
When the user worker process is put in a network namespace
/etc/resolv.conf will be mounted from /etc/netns/username
But if you are running systemd-resolved it will eventually re-mount /etc/resolv.conf
So if you want to use different resolvers inside network namespace's you have to disable systemd-resolved
sudo systemctl stop systemd-resolved
Backups
Run on another machine where you want to save the backups, the other machine also needs to have ZFS.
ssh root@prod 'zfs snapshot -r tank/home@today'
ssh root@prod 'zfs send -R tank/home@today' | pv | sudo zfs recv pool/home.ben

ssh root@ben.100m.se 'cd /etc/letsencrypt/ && tar -c -z *' | pv > letsencrypt.tar.gz
You might be able to do an incremental backup if you are lucky (zfs might complain that destination already exists or that it has changed)
zfs snapshot -r pool/home@today4
zfs send -RI pool/home@today2 pool/home@today4 | pv | ssh root@backuphost zfs recv -Fu pool/home
Migrating / Restoring from backup
When re-adding the users, make sure you use their old uid, or chown the home dirs for each user.
sudo useradd testuser -s /bin/false -u 998 -g 998
sudo chown -R testuser:testuser /home/testuser
After a migration/restoration run ./update.js to fix permissions in users home dirs.
It's a good idea to rsync and update folders just before switching over:
rsync -r --links /etc/letsencrypt/ root@kaj.100m.se:/etc/letsencrypt/ --progress
ssh root@ben.100m.se 'zfs snapshot -r tank/home@today2'
ssh root@ben.100m.se 'zfs send -i tank/home@today tank/home@today2' pv | sudo zfs recv zpcdata/home.ben
Make it so users only can see their own home dir:
chmod 751 /home
Removing guests accounts:
./dev-scripts/deleteAllGuests.js
Delete inactive users:
(note: deleting old users makes it possible for someone else to signup as the old username/domain)
./dev-scripts/deleteInactiveUsers.js
Adding all users as system users
./dev-scripts/addAllUsers.js
If you screwed up and placed root under the home/ filesystem,
the server you are migrating to will have it's /root folder over-mounted...
zfs set mountpoint=/root-old rpool/home/root
reboot
Copy over top level domain certificates from old server:
mkdir /etc/ssl/certs/letsencrypt
scp /etc/ssl/certs/letsencrypt/* root@kaj.100m.se:/etc/ssl/certs/letsencrypt/
scp /etc/ssl/private/* root@kaj.100m.se:/etc/ssl/private/
Apparmor debugging
sudo apt install apparmor-utils
sudo service apparmor reload
Add missing rules in profile:
sudo aa-genprof /usr/bin/nodejs_test123
Sometimes aa-genprof doesn't find everyting
sudo aa-logprof
See what's going on:
tail -f /var/log/kern.log
example problem: profile transition not found
is the profile active ?
sudo apparmor_status | grep nodejs
does it exist ?
ls /etc/apparmor.d/ | grep nodejs
is it disabled ?
ls /etc/apparmor.d/disable/
Temporary stopping apparmor
sudo service apparmor stop
sudo service apparmor teardown
Complain to allow everything but show logs
sudo aa-complain /home/demo/usr/bin/hg
Put a profile back into enforce
sudo aa-enforce /home/demo/usr/bin/hg
See systemd logs:
sudo journalctl -x
Try running the command inside/outside the chroot:
sudo chroot --userspec=ltest1:ltest1 /home/ltest1/ bash
Also see: http://manpages.ubuntu.com/manpages/bionic/man5/apparmor.d.5.html
http://manpages.ubuntu.com/manpages/xenial/man5/apparmor.d.5.html
Job for apparmor.service failed because the control process exited with error code
& Reload failed for AppArmor initialization.
service apparmor status will show the error message and what line the parser error is on
When working with Linux namespaces, Apparmor will sometimes complain that some file doesn't have rw access,
even though it has been defined in the Apparmor profile, but if you look closely that path is missing the /
root slash. Adding flags=(attach_disconnected) to the profile fixes that problem, and the profile rule will work again.
example: %HOME%%USERNAME%/bin/bash flags=(attach_disconnected) {
Creating a Docker daemon base VM
tip: Do this on a developer machine, then send the zvol to the production server
Create a zvol
sudo zfs create -V 16G rpool/docker
Install libvirt...
Make sure libvirt network is running:
virsh net-start default
Create a VM
cd dockervm
sudo virsh define docker.xml
Make sure you have the correct path to the zvol disk:
ls /dev/zvol/
virsh edit docker
Check the IP of the VM
sudo virsh net-dhcp-leases default
Install an operating system on the VM...
Attach cdrom:
virsh attach-disk docker /tmp/debian-live-11.2.0-amd64-standard.iso hda --driver qemu --type cdrom --mode readonly
Remove cdrom:
virsh change-media docker hda --eject
Access VNC
See VNC port: (usually 5900)
netstat -plnt
Connect from dev machine to server:
ssh root@hostserver.org -L 5900:127.0.0.1:5900
Connect to the VNC server using Remmina
Enable serial on the guest: First login to the guest vm via vnc, then:
sudo systemctl enable serial-getty@ttyS0
sudo systemctl start serial-getty@ttyS0
(tip: Alt+64 will insert @)
This makes it possible to access the VM guest via serial from the host:
virsh console docker
(default debian live user is "user", and password is "live")
Installing a basic Linux OS from Live CD
sudo su
fdisk -l
fdisk /dev/vda
The following are fdisk commands:
delete partion = d
create new = n
type of partition = p
partition number = 1
first sector = 2048
last sector = (press Enter to use default=whole disk)
write partition = w
mkfs.ext4 /dev/vda1
mount /dev/vda1 /mnt
df /mnt
mkdir /mnt/run
mount -t tmpfs tmpfs /mnt/run
mkdir /mnt/run/lock
mkdir /mnt/tmp
chmod 1777 /mnt/tmp
apt update
apt install debootstrap -y
debootstrap bullseye /mnt
nano /mnt/etc/fstab
The content of /mnt/etc/fstab
/dev/vda1 / ext4 rw,relatime 0 1
hostname docker
hostname > /mnt/etc/hostname
ip addr show
nano /mnt/etc/network/interfaces.d/ens3
The content of /mnt/etc/network/interfaces.d/ens3
auto ens3
iface ens3 inet dhcp
(ens3 is the network device, often named eth0)
nano /mnt/etc/apt/sources.list
The content of /mnt/etc/apt/sources.list (depends of what dist you installed using debootstrap)
deb http://deb.debian.org/debian bullseye main contrib
deb-src http://deb.debian.org/debian bullseye main contrib
deb http://deb.debian.org/debian-security bullseye-security main contrib
deb-src http://deb.debian.org/debian-security bullseye-security main contrib
deb http://deb.debian.org/debian bullseye-updates main contrib
deb-src http://deb.debian.org/debian bullseye-updates main contrib
mount --make-private --rbind /dev /mnt/dev
mount --make-private --rbind /proc /mnt/proc
mount --make-private --rbind /sys /mnt/sys
chroot /mnt bash --login
apt update
apt install --yes console-setup locales
dpkg-reconfigure locales tzdata
(make sure you select the en_US. UTF-8 locale)
apt install --yes dpkg-dev linux-headers-amd64 linux-image-amd64 sudo
apt install --yes grub-pc
grub-probe /boot
nano /etc/default/grub
Add ` console=tty0 console=ttyS0,115200n8` to `GRUB_CMDLINE_LINUX_DEFAULT`
update-initramfs -c -k all
update-grub
grub-install /dev/vda
Generate a ssh key on the host server (don't set a password)
`ssh-keygen -f /root/.ssh/dockervm`

Copy generated public key
`sudo cat /root/.ssh/dockervm.pub`

Install SSH server on the docker (guest) VM and disable password login
apt install --yes openssh-server
nano /etc/ssh/sshd_config
Content of /etc/ssh/sshd_config (place at the end to overwrite)
ChallengeResponseAuthentication no
PasswordAuthentication no
UsePAM no
PermitRootLogin yes
PermitRootLogin prohibit-password
then restart sshd:
`sudo systemctl reload sshd`

Set the password to "dockerpw" on the VM
`passwd`

If you (or the installer) did create a user, make sure the user uid ang gid are below 1000 so that it wont collide with WebIDE users:
usermod -u 999 docker
groupmod -g 999 docker
(Might have to enable root login as you can't change uid if there are processes running as that user)

Add public key to the VM (copy/paste)
mkdir ~/.ssh
nano ~/.ssh/authorized_keys
chmod 700 ~/.ssh/
chmod 664 ~/.ssh/authorized_keys
systemctl enable serial-getty@ttyS0
ip a
exit
reboot
Remove the livecd, from the host server, run:
virsh change-media docker hda --eject
Logout and relogin (make sure you can't login with a password)
`sudo ssh -i /root/.ssh/dockervm docker@192.168.122.96`


Force restart in case shutdown doesn't work:
virsh destroy docker && virsh start docker
Follow instructions to install Docker daemon:
https://docs.docker.com/engine/install/debian/

Enable TCP access to the docker Daemon (https://success.docker.com/article/how-do-i-enable-the-remote-api-for-dockerd)
`sudo mkdir -p /etc/systemd/system/docker.service.d/`
`sudo nano /etc/systemd/system/docker.service.d/startup_options.conf`
/etc/systemd/system/docker.service.d/override.conf
[Service]
ExecStart=
ExecStart=/usr/bin/dockerd -H fd:// -H tcp://0.0.0.0:2376
sudo systemctl daemon-reload
sudo systemctl restart docker.service
Se DHCP leases (from host)
virsh net-dhcp-leases default
If you have issues with the libvirt DHCP try cleaning out /var/lib/libvirt/dnsmasq/

Make sure the share is working (inside VM)
`sudo ls -la /sys/bus/virtio/drivers/9pnet_virtio/`
(should have a virtio link to a device)

note: Must shutdown -h in order to edit shares! (eg. reboot wont work)

Copy the dockervm/check_config_in_vm.sh script into the VM:
`nano check_config_in_vm.sh`

Make it runable
`sudo chmod +x check_config_in_vm.sh`


Note: The very last thing before shutting down and creating a new snapshot is to empty the machine id,
this will make sure a new unique machine id is generated when the cloned snapshot VM is booted!
/etc/machine-id
/var/lib/dbus/machine-id
Shutdown the VM
`sudo shutdown -h now`

Create a snapshot of the zvol (make sure the VM is shut down first!)
sudo zfs snapshot rpool/docker@base

ZFS will reuse the the snapshot when cloning!
So if you need to change something in base, you would have to delete all docker zvol's!

sudo zfs destroy rpool/docker@base
sudo zfs snapshot rpool/docker@base


List snapshots
zfs list -t snapshot


If you have problems connecting to the Docker VM, try
sudo iptables -I FORWARD 1 -j ACCEPT
sudo iptables -I INPUT 1 -j ACCEPT
sudo iptables -I OUTPUT 1 -j ACCEPT

when you are done:
sudo iptables -D FORWARD 1
sudo iptables -D INPUT 1
sudo iptables -D OUTPUT 1


libvirt need to run as root, in order to make it possible for Docker containers to write in the user home dir
sudo nano /etc/libvirt/qemu.conf
user = "root"
group = "root"
dynamic_ownership = 0
Setup libvirt DHCP
Note that users netns is 10.0.X.Y so we will use 10.2.X.Y for the Docker VM's

sudo virsh net-edit default

<ip address='10.2.0.1' netmask='255.255.0.0'>
    <dhcp>
      <range start='10.2.121.2' end='10.2.125.254'/>
    </dhcp>
</ip>


Moving user to another server using ZFS
---------------------------------------
Run this command from the server you want to move the user TO:
`ssh root@whereuserat 'zfs snapshot fromvol/home/nameofuser@backup && zfs send fromvol/home/nameofuser@backup' | sudo zfs receive tovol/home/nameofuser`

(The same method can be used to make backups, see backup.sh)

Enable the user on the new server by adding a new system account:
`sudo useradd -r -s /bin/false nameofuser`


Copying files from one server to another
----------------------------------------
For single files:
`scp -3 root@server1:/etc/file1 root@server2:/etc/`
Copy entire folder:
`ssh root@sourceHost "tar cf - /path/folder/ | gzip" | ssh root@destHost "gunzip | tar xvf -"`


Take a snapshot before upgrading the server
-------------------------------------------
It's a good idea to take a system snapshot before making system updates, so that you can roll back in case something goes wrong.
sudo zfs list -t snapshot
sudo zfs snapshot ben/ROOT/ubuntu@upgrade
sudo apt update && sudo apt upgrade
cannot create snapshot 'ben/ROOT/ubuntu@upgrade': dataset already exists
sudo zfs destroy ben/ROOT/ubuntu@upgrade
sudo zfs snapshot ben/ROOT/ubuntu@upgrade
optional: To prevent running out of disk space, remove packages no longer needed
`sudo apt autoremove`

Always reboot after a system upgrade to check if the system boots with the new upgrades
You don't want the system to be stuck at boot during a unplanned reboot (for example automatic start after power failure)


Downgrade libvncserver on Ubuntu 18
-----------------------------------
In July 2020 Ubuntu 18 got a patch which broke protocol with all noVNC versions.
(Ubuntu 20 has a different version of libvncserver - it however only works with older versions of noVNC.)

To remedy the situation you have to either downgrade libvncserver and ignore the security patch. Or upgrade to Ubuntu 20.
Here's how to downgrate libvncserver on Ubuntu 18 (you need to do this after avery apt upgrade!)


$ `dpkg -l | grep libvncserver`

ii  libvncserver1:amd64                           0.9.11+dfsg-1ubuntu1                             amd64        API to write one's own VNC server


$ `apt-cache madison libvncserver`

libvncserver | 0.9.11+dfsg-1ubuntu1 | http://ubuntu.mirror.su.se/ubuntu bionic/main Sources
libvncserver | 0.9.11+dfsg-1ubuntu1.2 | http://ubuntu.mirror.su.se/ubuntu bionic-security/main Sources
libvncserver | 0.9.11+dfsg-1ubuntu1.2 | http://ubuntu.mirror.su.se/ubuntu bionic-updates/main Sources

$ `sudo apt install libvncserver1=0.9.11+dfsg-1ubuntu1`

And then use version v1.1.0 of noVNC (or earlier).

Also if you have unattended upgrades enabled you have to disable them or it will be automatically "upgraded" to the non working version:
```
less /var/log/apt/history.log

dpkg-reconfigure unattended-upgrades

nano /etc/apt/apt.conf.d/20auto-upgrades
```


Regularly run zpool scrub
-------------------------

You want to check the hard drives from time to time:

`sudo zpool scrub tank`

Also install smartctl to monitor hdd errors:

`sudo apt-get install smartmontools `

See disk info:
ls /dev/disk/by-id/
sudo smartctl -x /dev/disk/by-id/ata-TOSHIBA_DT01ACA300_Z7I4AR5AS
Problems cloning from Github
----------------------------
Make sure the server has hggit installed!
`python -c "import hggit"`
(should not give an error if it's installed)
How to install:
sudo apt-get install python-pip
sudo pip install hg-git
Make sure hg-git and dulwich is installed in /usr/local/lib/ and not /home
If hggit doesn't work in chroot, try:
sudo su
pip install dulwich
pip install hg-git
You might need to reboot the server to clear mounted libs


Problems running apt
--------------------
You might get an error like this:
unable to make backup link of './usr/bin/python2.7' before installing new version: Invalid cross-device link

This is because the program is mounted in user dir's. Stop webide and then reboot the server to release all mountpoints.


Testing in Opera Mobile
========================

Download Opera Classic Mobile Emulator: https://www.opera.com/developer/mobile-emulator
Mac: brew cask install opera-mobile-emulator


Download Opera Browser version 12 (we need the debugger, aka. Opera Dragonfly)
https://get.geo.opera.com/pub/opera/linux/1216/


Goto any web page in Opera 12 - right click and select "Inspect Element". This will start the debugger

In the Opera 12 Debugger, top right corner there is an icon that looks like |))) it says "Remote Debug Configuration"
Click the "Remote Debug Configuration" icon, and then click on the Apply  button next to the port number.

Now start Opera Classic Mobile Emulator.
Enter opera:debug in the URL field.
Enter the IP for the machine Opera 12 is running on. Then enter the port nr (default 7001).
Click Connect.

Note: This also work on the Opera Mobile app

Once Opera Mobile is connected to the Debugger, you can control it from the debugger.

If you have not done it alredy, start the WebIDE server:
sudo node server/server.js -port 8080 -ip 192.168.0.1
(change IP to the machine's IP)

Click "Console" in the Opera 12 debugger
Type:
document.location="http://192.168.0.1:8080/";
And click Enter.
This should make Opera Mobile to navigate to that page.
And you will see all console.log's etc in the debugger!

If the connection is lost you must restart Opera Mobile.


Debugging display/desktop issues
================================
sudo apt install x11-apps

Try running xeyes (app) from the terminal emulator, and see if you get anything on the display


Android support
===============

When installing android-studio, the android-studio folder needs to be in  ~/Android
(The Sdk folder also need to be in ~/Android)

setup wizard screen is blank when running android studio in vnc
---------------------------------------------------------------
Edit android-studio/bin/idea.properties and add
disable.android.first.run=true


NPM packages
=============

If you get a message like "Cannot find module" when running "npm start",
you could try resetting your globally installed npm-packages:

´rm -rf ~/.npm-packages/*´


Setup central logging
=====================

On logging server, edit /etc/rsyslog.conf
(replace 10.20.30.40 and somedomain with the IP or hostnames of your servers that shall send logs here)
provides TCP syslog reception
module(load="imtcp")
input(type="imtcp" port="514")
specify senders you permit to access
$AllowedSender TCP, 10.20.30.40, somedomain.org, subdomain.somedomain.org, *.somedomain.com
And edit /etc/rsyslog.d/50-default.conf
specify where logs files should be saved. Example:
auth,authpriv.* /tank/logs/log/auth.log
Remote nginx
:syslogtag, isequal, "nginx_access:" /tank/logs/log/nginx_access.log
:syslogtag, isequal, "nginx_error:" /tank/logs/log/nginx_error.log
bash logging
local6.*;local1.notice /tank/logs/log/commands.log
sudo systemctl restart rsyslog
On the client servers
Edit /etc/rsyslog.d/50-default.conf
# Send auth logs to log server:
auth,authpriv.*                 @@log.logserver.org:514
# Send bash logs to log server:
local6.*                 @@log.logserver.org:514
For mailservers, also add:
mail.* @log.logserver.org:514
add to the end (settings for when Rsyslog Server would be down)
$ActionQueueFileName queue
$ActionQueueMaxDiskSpace 1g
$ActionQueueSaveOnShutdown on
$ActionQueueType LinkedList
$ActionResumeRetryCount -1
Send bash logs
Edit /etc/bash.bashrc
export PROMPT_COMMAND='RETRN_VAL=$?;logger -p local6.debug "$(whoami) [$$]: $(history 1 | sed "s/^[ ]*[0-9]\+[ ]*//" ) [$RETRN_VAL]"'
On Freebsd:
Edit /etc/csh.cshrc
alias precmd "history 1 | /usr/bin/logger -p local1.notice -t `echo $SHELL`:`whoami`:`pwd`:`ip r l |cut -d' ' -f12` -i "
And edit /etc/syslog.conf
local1.notice @log.logserver.org:514
And remove *.notice from /var/log/messages
Send Nginx logs
edit /etc/nginx/nginx.conf
#access_log /var/log/nginx/access.log;
#error_log /var/log/nginx/error.log;

log_format main  '[$time_local] $http_host $remote_addr $status "$request" "$http_referer" "$http_user_agent" $bytes_sent $request_time $remote_user';

access_log syslog:server=log.logserver.org,tag=nginx_access main;
error_log syslog:server=log.logserver.org,tag=nginx_error;
Restart syslog and nginx:
sudo systemctl restart rsyslog
sudo systemctl restart nginx
Troubleshooting rsyslog
Make sure local6.* etc are above . /var/log/syslog !!
@ in config uses UDP while @@ uses TCP !?!?
Get the process id:
ps auxw | grep syslog
Use strace (apt install strace) to see what is going on
strace -s 500 -tfp #pid#
sendto() sends the message to the logging server.
connect() means it's trying TCP
Check the the syslog...
rsyslogd-2359: action 'action 1' resumed (module 'builtin:omfwd') [v8.16.0 try http://www.rsyslog.com/e/2359 ]
rsyslogd-2359: action 'action 0' resumed (module 'builtin:omfwd') [v8.16.0 try http://www.rsyslog.com/e/2359 ]
Messages like that usually means something is wrong...
What version of rsyslog ?
rsyslogd -version


