Security News
vlt Launches "reproduce": A New Tool Challenging the Limits of Package Provenance
vlt's new "reproduce" tool verifies npm packages against their source code, outperforming traditional provenance adoption in the JavaScript ecosystem.
Mac 或 Windows 系统推荐使用客户端版本:https://github.com/avwo/whistle-client
Whistle 是基于 Node 实现的跨平台抓包调试工具,其主要特点:
已安装
brew的 PC,可以省略以下 1、2 步骤,直接通过以下方式一键安装:brew install whistle && w2 start --init
npm i -g whistle && w2 start --init
上述命令会先全局安装 Whistle 的 npm 包后,启动 Whistle 并设置系统全局代理,以及安装系统根证书,目前一键安装只支持 Mac & Windows 系统,其它系统按照下面 手动安装 的方式操作。
如果安装过程时报错
Bad CPU type in executable,在命令执行arch -x86_64 zsh再重新执行一键安装命令。
Mac 需要两次输入开机密码或指纹验证


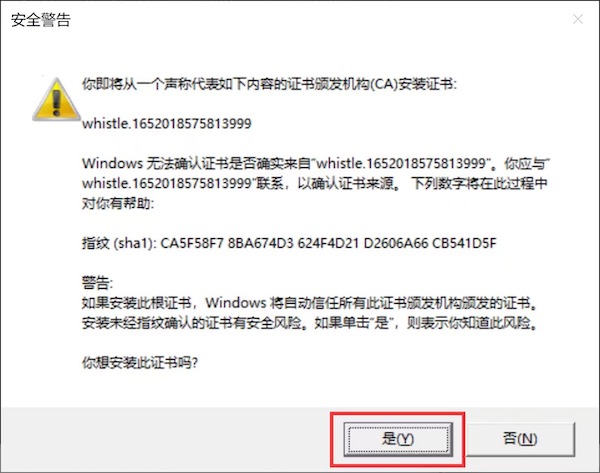
Windows 需要最后点击 “是(Y)” 确认

如果需要自定义代理配置或根证书(如设置其它代理,根证书或代理白名单等)可以通过以下命令实现:
w2 proxy 设置系统全局代理:https://wproxy.org/whistle/proxy.htmlw2 ca 设置系统根证书:https://wproxy.org/whistle/proxy.html也可以用下面 手动安装 方式。
非 Mac & Windows 系统或一键安装失败可以按下面方式设置代理和安装根证书:
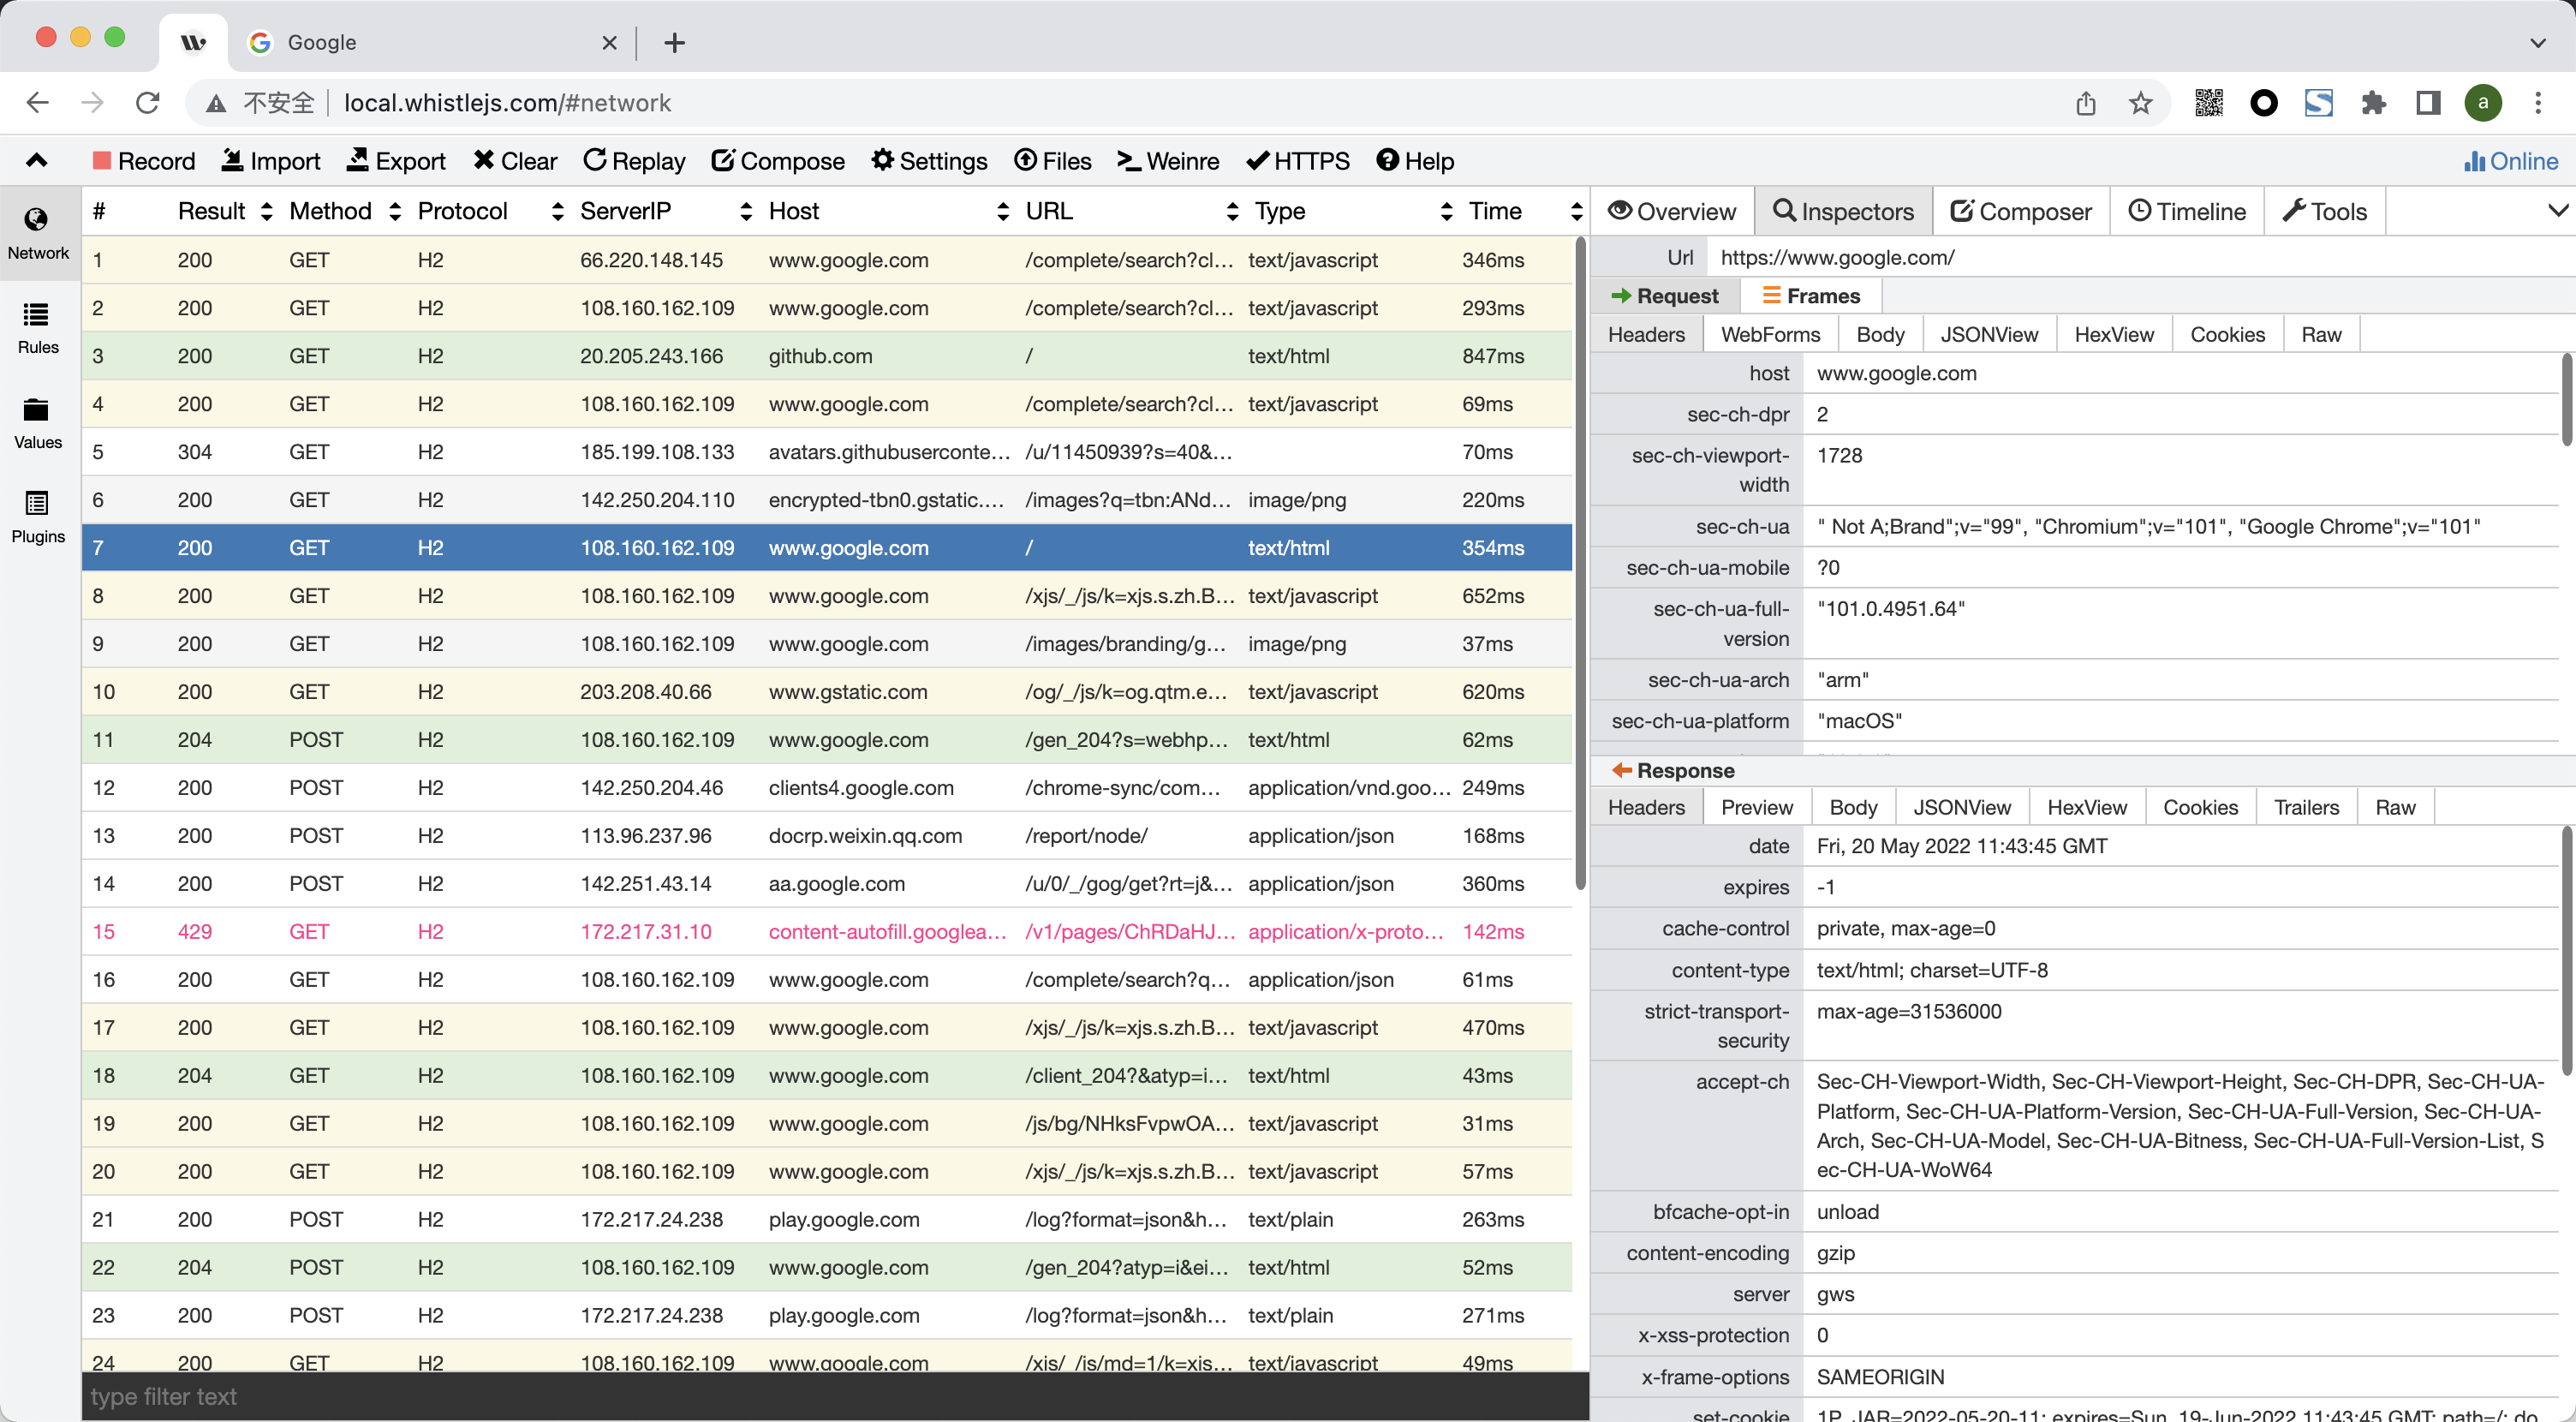
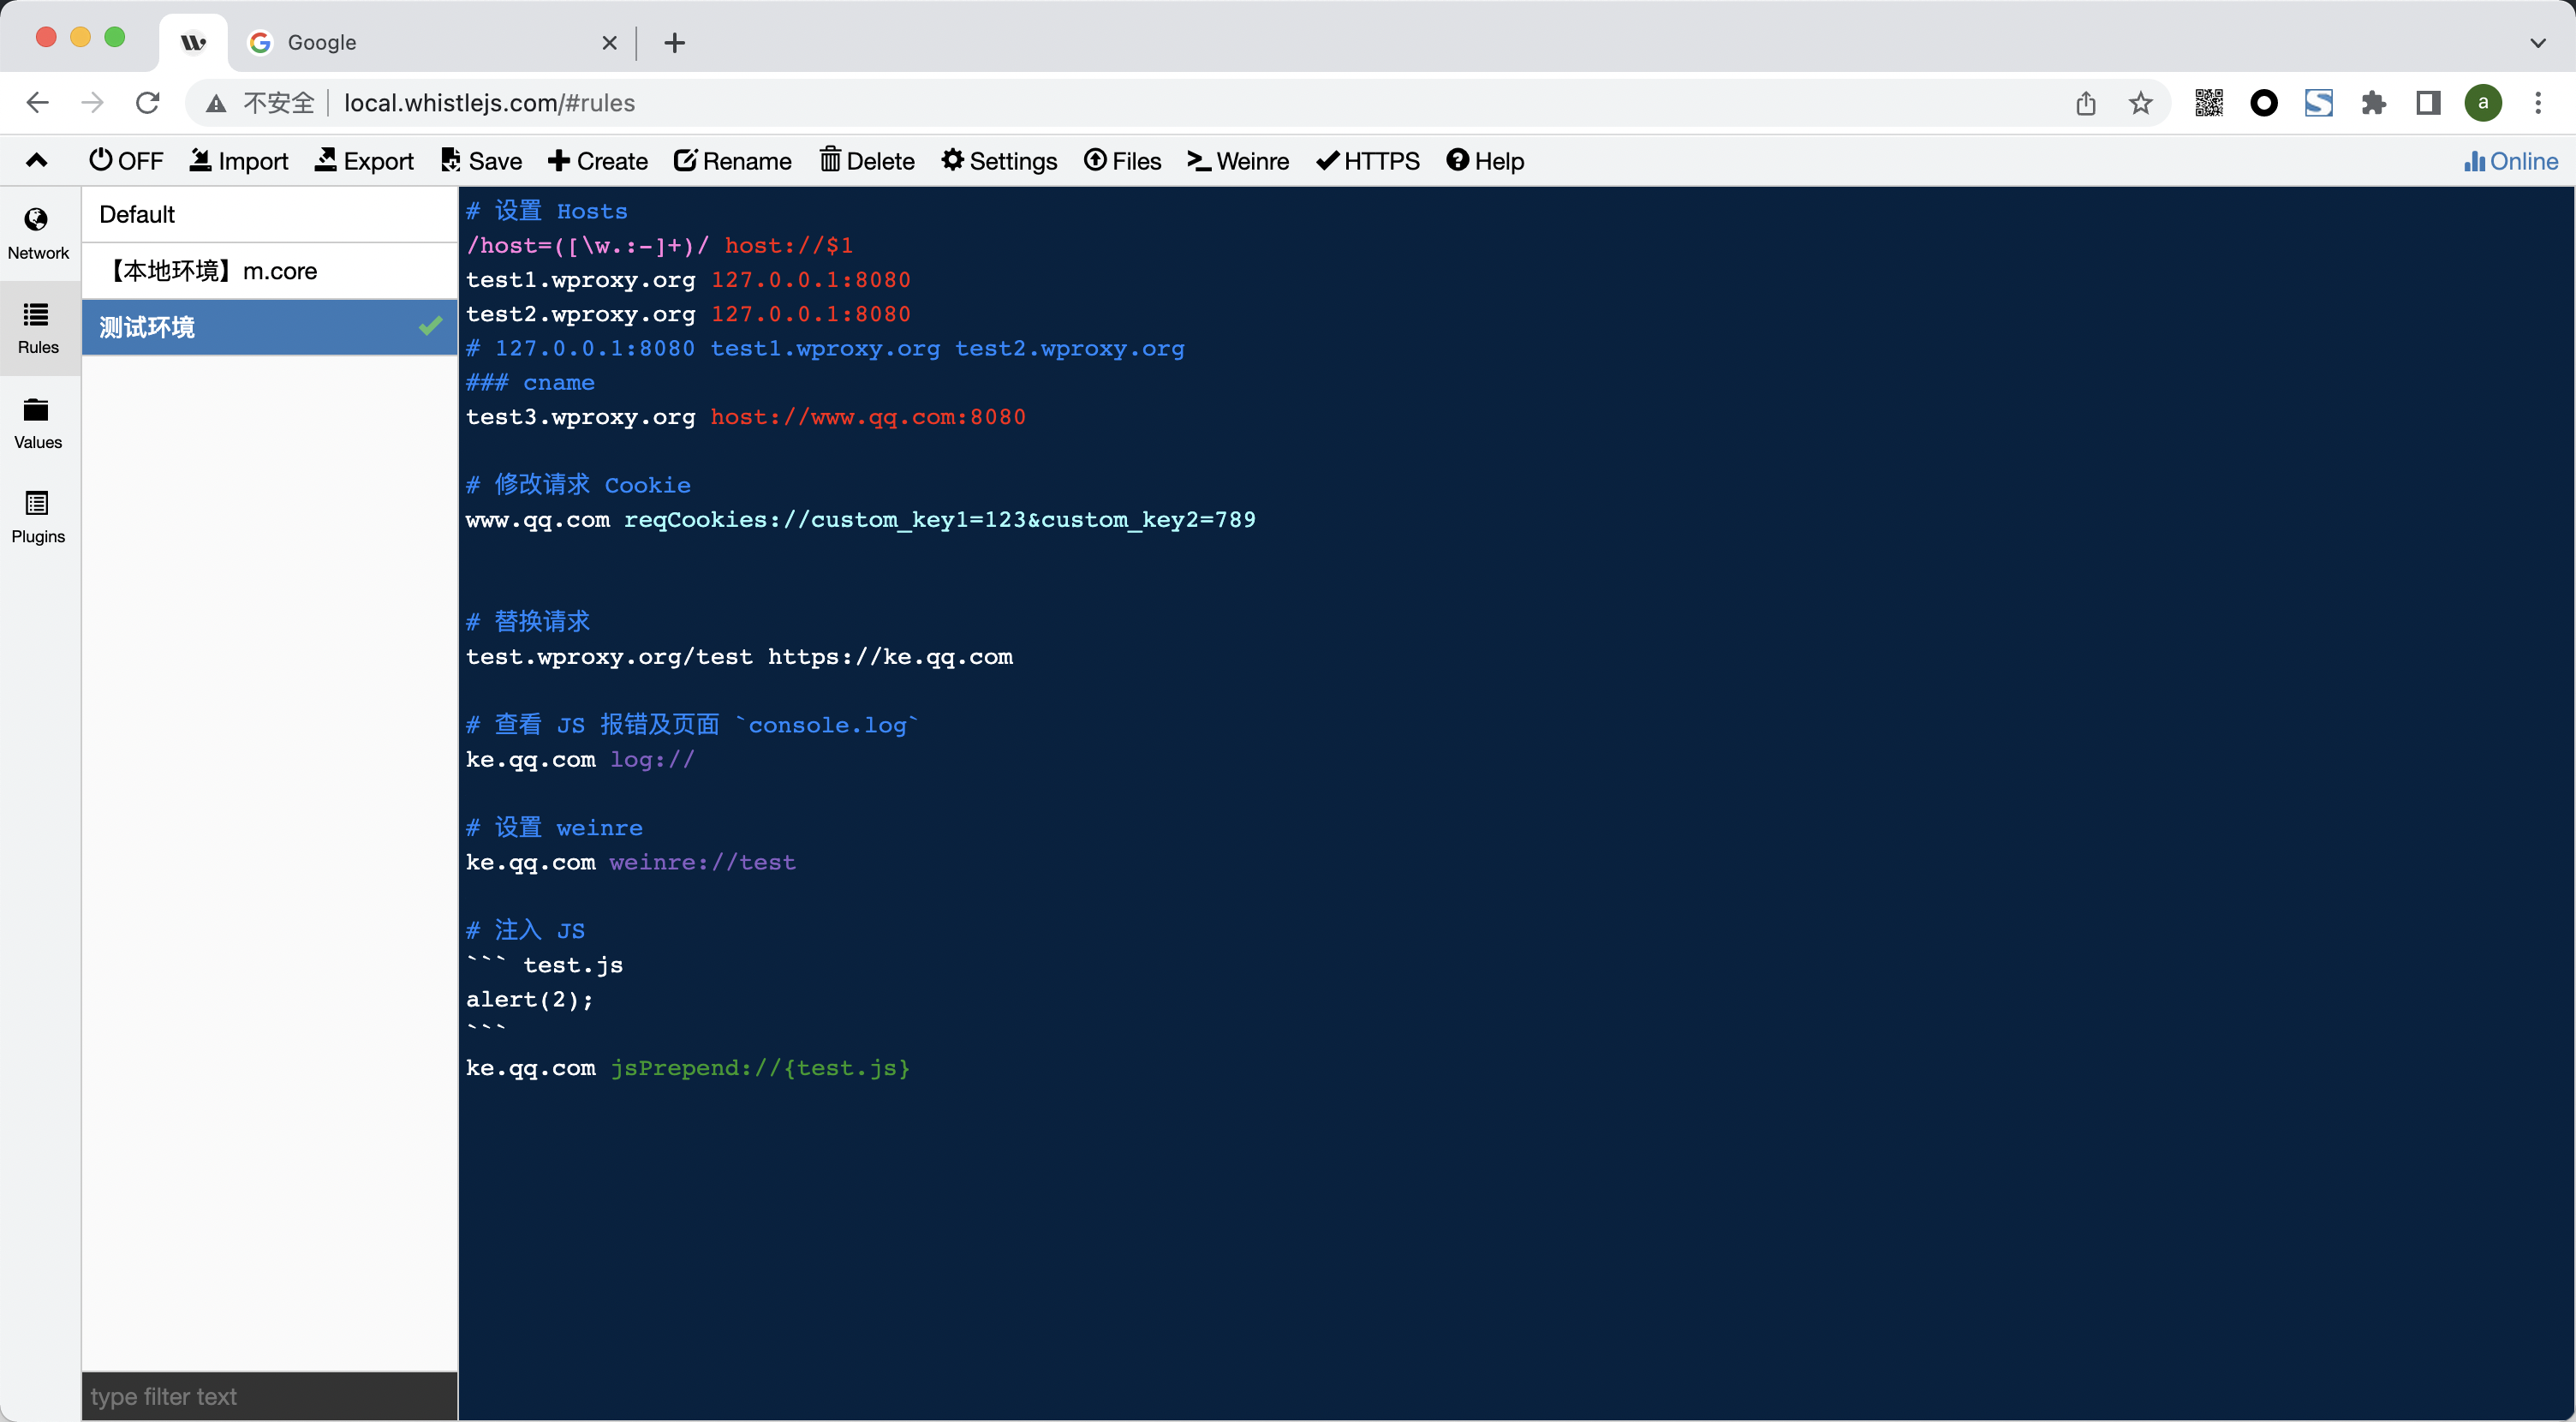
安装成功后,用 Chrome 打开链接 http://local.whistlejs.com 即可看到 Whistle 的抓包配置界面:


打开 Chrome 扩展商店进行安装 https://chrome.google.com/webstore/detail/proxy-switchyomega/padekgcemlokbadohgkifijomclgjgif
全局代理如果会影响到某些客户端的请求(客户端设置了 ssl pinning),也可以使用 Chrome 插件设置代理(只对 Chrome 生效):
可以通过
w2 proxy off关闭全局代理
设置 Whistle 代理

选择 Whistle 代理

w2 restart -n yourusername -w yourpasswordv2.9.88
enable://captureStreamFAQs
HTTP, HTTP2, HTTPS, Websocket debugging proxy
The npm package whistle receives a total of 1,265 weekly downloads. As such, whistle popularity was classified as popular.
We found that whistle demonstrated a healthy version release cadence and project activity because the last version was released less than a year ago. It has 0 open source maintainers collaborating on the project.
Did you know?

Socket for GitHub automatically highlights issues in each pull request and monitors the health of all your open source dependencies. Discover the contents of your packages and block harmful activity before you install or update your dependencies.

Security News
vlt's new "reproduce" tool verifies npm packages against their source code, outperforming traditional provenance adoption in the JavaScript ecosystem.

Research
Security News
Socket researchers uncovered a malicious PyPI package exploiting Deezer’s API to enable coordinated music piracy through API abuse and C2 server control.

Research
The Socket Research Team discovered a malicious npm package, '@ton-wallet/create', stealing cryptocurrency wallet keys from developers and users in the TON ecosystem.